
|
|
|
|
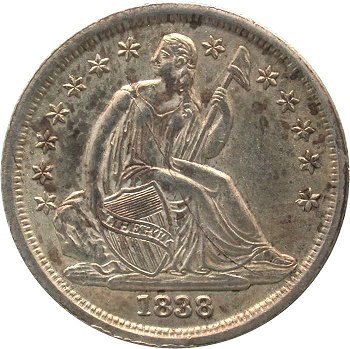
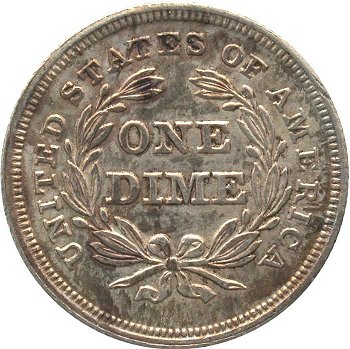
1838
Variety 111a
Obverse 7: Cracked Obverse #3, Star 13 Repunched
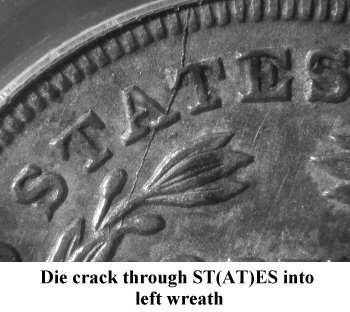
Reverse H.2: Die Crack ST(AT)ES
Obverse 7 Reverse H.2
Obverse Diagnostic Point(s) Reverse Diagnostic Point(s)
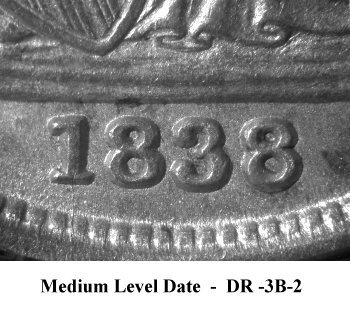
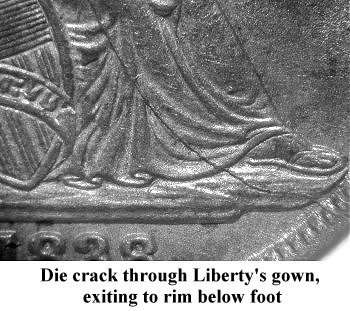
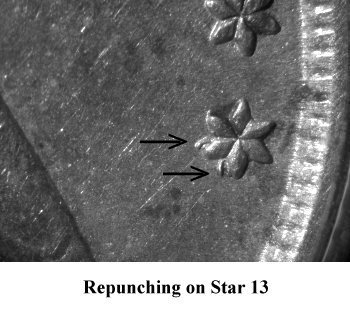
Comments: Obverse 7 is the last of the 1838 obverse dies with a bisecting die crack. In this case, the die crack originates at Star 7 and proceeds through Liberty's left shoulder, across her body and left leg and finally exits below her foot to the rim. Star 13 is strongly repunched.
Reverse H, in a later die state, shows a die crack starting at the rim above STA(T)ES, through ST(AT)ES and terminating within the upper left wreath. This die state still exhibits die scratches behind the ribbon bow.
Reverse H will be again employed in 1839 for one final die pairing. I have seen more examples of the Obverse 8 and Reverse H die pairing with the cracked reverse die than the earlier reverse die state.
Plate Coin: G. Fortin Collection, MS62 - Greer Plate Coin