
|
|
|
|
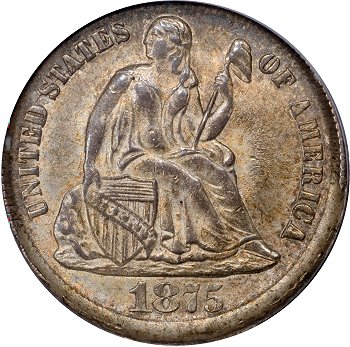
1875-CC
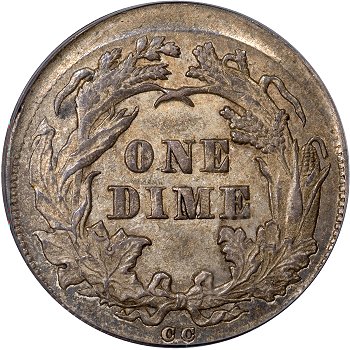
CC Below Wreath
Variety 114
Obverse 7.3: High Date, Slight Downward Slope, Die Crack Through STATES to Head
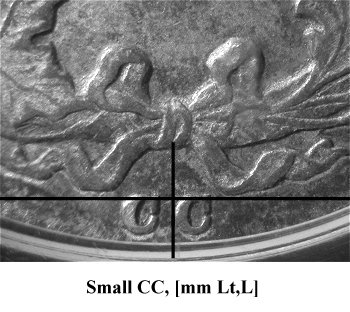
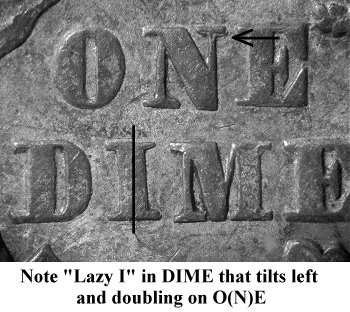
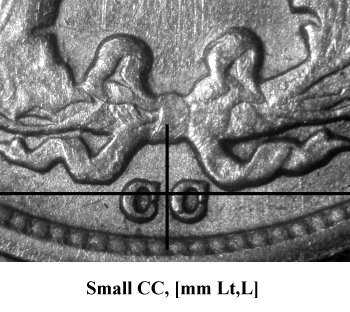
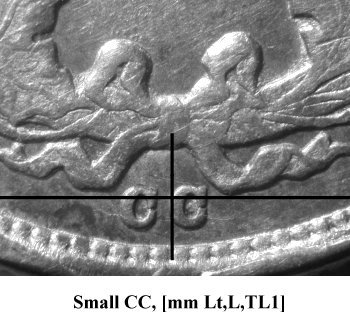
Reverse H: Small CC, [mm Lt,L], "Lazy I" in DIME
Collar: 113 Reeds
Obverse 7.3 Reverse H
Obverse Diagnostic Point(s) Reverse Diagnostic Point(s)
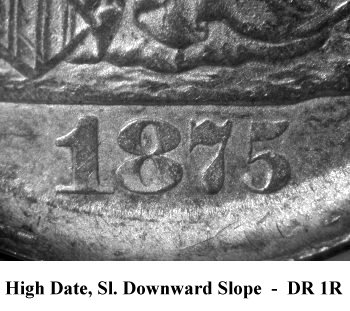
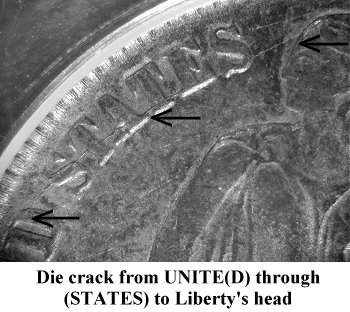
Comments: Obverse 7 degrades further to a very late die state with a strong die crack from the top of UNITE(D), through the middle of (ST)ATES and across the bottom of ST(ATES) to Liberty's head. There is a less evident die crack between the rim and AMER(ICA).
Obverse 7 is paired with a fourth reverse die which is labeled Reverse H. The Small CC mintmark on Reverse is positioned low with respect to the ribbon ends and is the lowest positioned mintmark seen on Below Wreath varieties. The denomination ONE DIME also presents incremental diagnostics for Reverse H. The O(N)E shows doubling on the upper right segment and top cross bar. The D(I)ME tilts left and is designated as a "Lazy I".
Variety 114 was first brought to my attention by A.H. Foerder during email conversations in October 2011. He had purchased an 1875-CC Below Wreath die in PCGS holder that was 5% off center and began to extract diagnostics against published varieties contained in this web-book. At that time, A.H. believed his dime may have some unique characteristics and asked the author to inspect and confirm his observations. As a result of email discussion and my personal inspection of his dime, we were able to confirm an 8th 1875-CC Below Wreath reverse die.
Previous/Subsequent Die Pairings - Below Wreath Obverse 7
During earlier die states, BW Obverse 7 was paired with an In Wreath reverse die (IW Variety 105) and is previously designated as IW Obverse 4. BW Obverse 7 was previously paired with BW Reverse E (BW Variety 108), BW Reverse F (BW Variety 109) and BW Reverse G (BW Variety 110).
Previous/Subsequent Die Pairings - Below Wreath Reverse H
Reverse H is first identified during this late die state pairing with Obverse 7.
Comparisons of Reverse F, G and H Mintmark Positions
Attributing Reverse F vs. G and now H can be a difficult task as the mintmark positions are quite similar. Below are images from the Variety 109, 110 and 114 plate coins. Let's start with the mintmark position comparison and note that the right C on Reverse G is higher than left C while on Reverse F, the two C punches are level. On Revere H, the CC mintmark is clearly positioned lower than on Reverse F or G. Neither Reverse F or Reverse G exhibit the "Lazy I" in DIME found on Reverse H. Reverse F also exhibits a die scratch below the lower left wreath at 7:00 and the (D)IME is obviously doubled above the D.
Below Wreath Reverse F Below Wreath Reverse G Below Wreath Reverse H
Specific Diagnostics for Reverse F Only
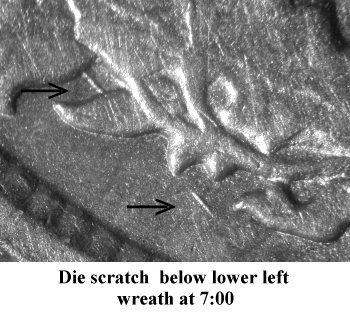
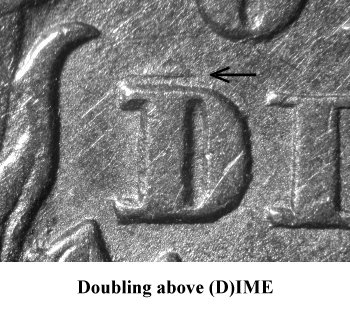
Plate Coin: Courtesy of A.H. Foerder Collection, PCGS MS60 Struck 5% Off Center