
|
|
|
|
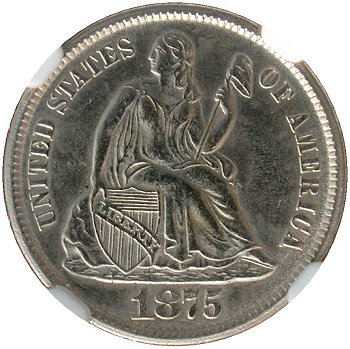
1875-CC
CC In Wreath
Variety 113a
Obverse 9.2: High Level Date, Die Crack Through Bottom Date
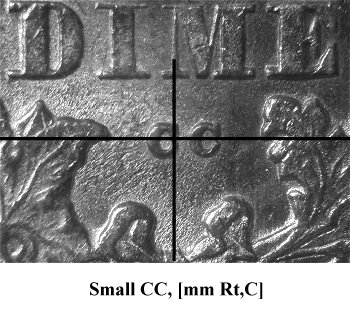
Reverse I.2: Rim Cud at 12:00, Cracked Die, Small CC, [mm Rt,C]

Obverse 9.2 Reverse I.2
Obverse Diagnostic Point(s) Reverse Diagnostic Point(s)
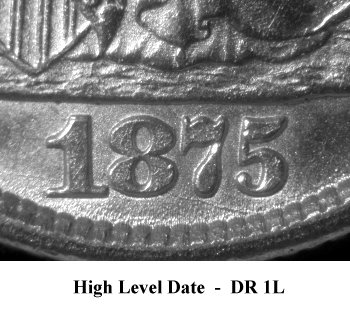
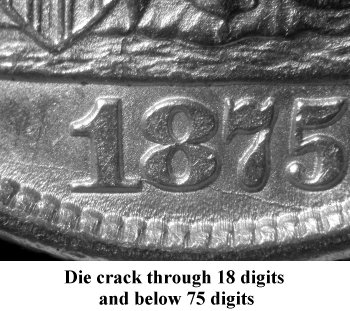
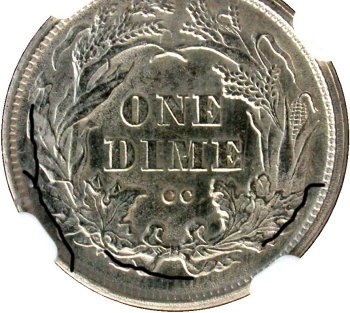
Comments: While still paired with an In Wreath reverse die, Obverse 9 continues to exhibit metal stress with the die crack through bottom of date digits becoming more evident. The seconday die crack which runs from Liberty's foot up through AMER(ICA) is also more distinct and comparable to that found during initial pairing with Below Wreath Reverse B.
Reverse I is now cracked and exhibits a rim cud at 12:00. There are three die cracks of note; first is from the rim at 7:30 up through the edge of wreath leaves, a second die crack connects the ribbon ends and finally, a third die crack from the rim at 3:30 down through the edge of oak leaves.
Previous/Subsequent Die Pairings - In Wreath Obverse 9
After striking In Wreath dimes with this die pairing, Obverse 9 will be paired with BW Reverse B (Variety 103) to strike additional coinage. This obverse die will continued to degrade during this pairing with the die crack through the date becoming more severe. In the final die pairing with BW Reverse E (Variety 112), the obverse die completely shatters producing a huge cud through the date digits.
Previous/Subsequent Die Pairings - In Wreath Reverse I
Variety 113 is the only known die pairing with Reverse I. The centered mintmark position and die cracks listed here should allow for easier identification of other potential die pairings.
Plate Coin: G. Fortin Collection, NGC AU55