
|
|
|
|
Repunched Date Index
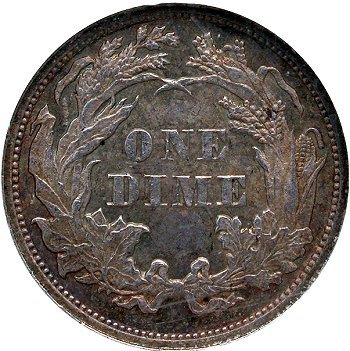
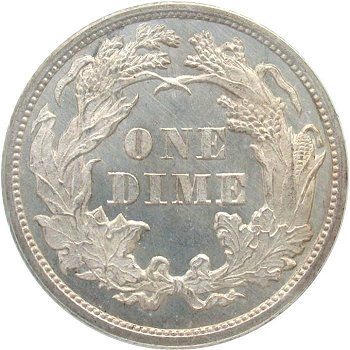
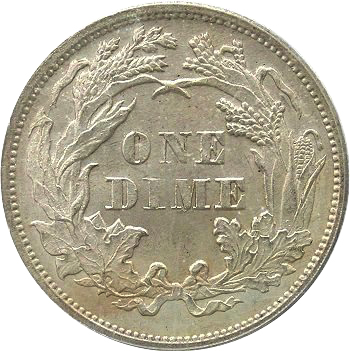
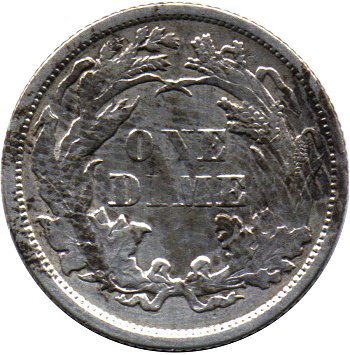
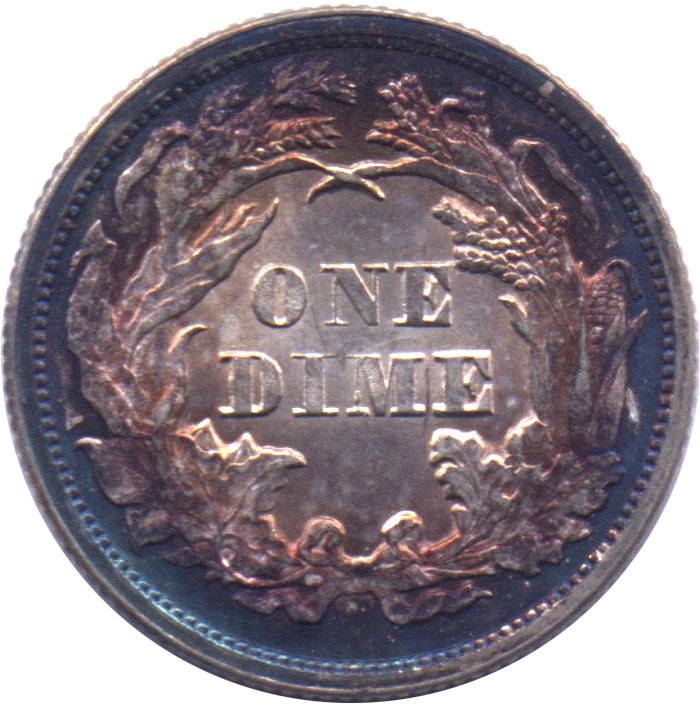
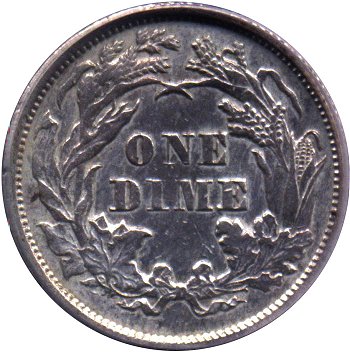
With Legend 1860-1891
|
Date
and Variety |
Major
Sets |
Obverse Image |
Reverse Image |
Variety Macro Image |
Description |
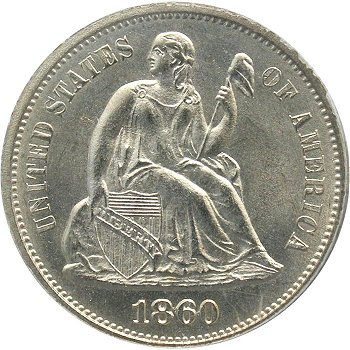
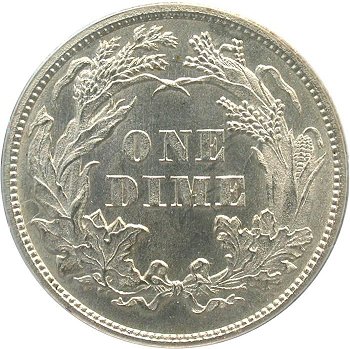
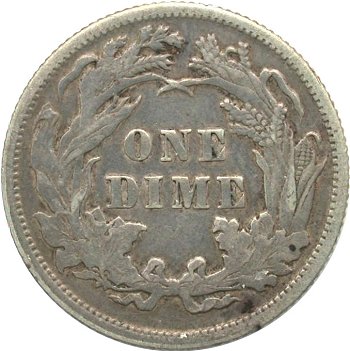
| 1860 | |||||
|
F-109 |
|
 |
 |
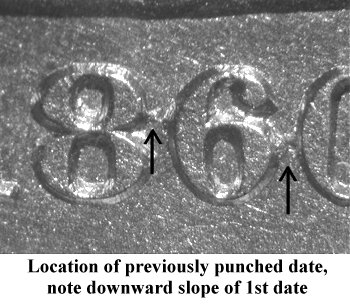 |
Repunched digits are visible between the upper section of the 86 digits and the middle section of the 60 digits. |
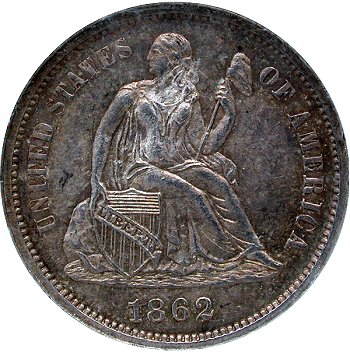
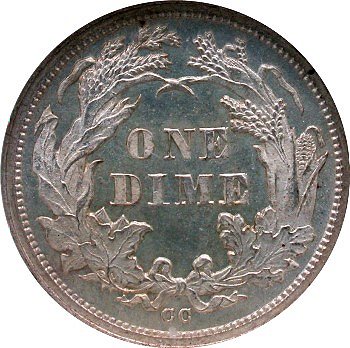
| 1862 | |||||
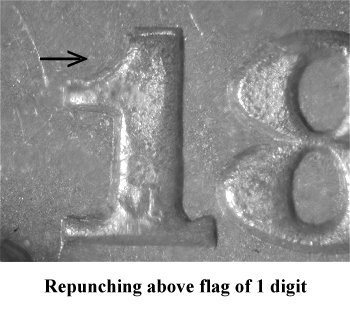
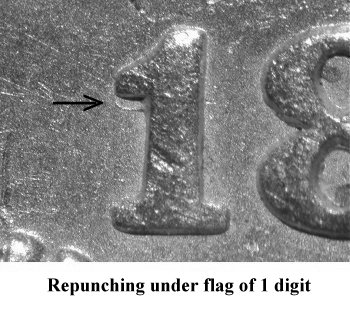
|
F-105 |
Ultimate Varieties |
 |
 |
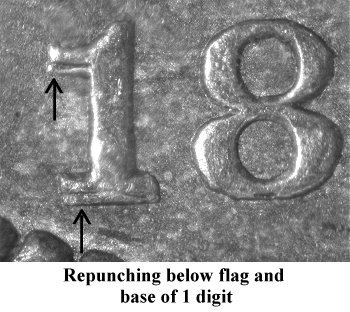 |
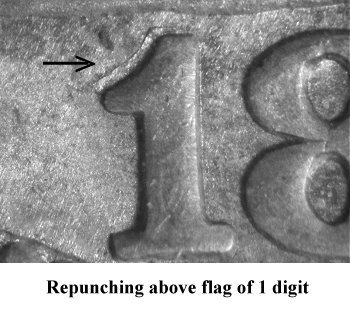
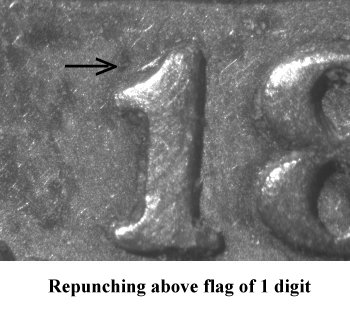
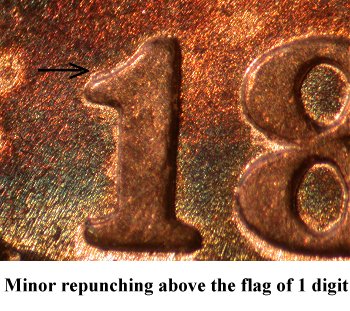
Early die states will exhibit a boldly repunched 1 digit. Check under the flag and the base. |
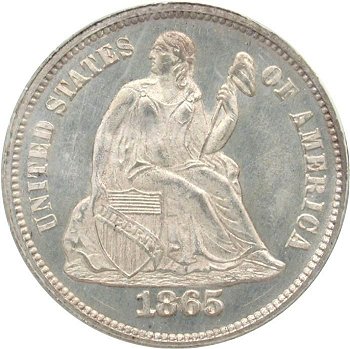
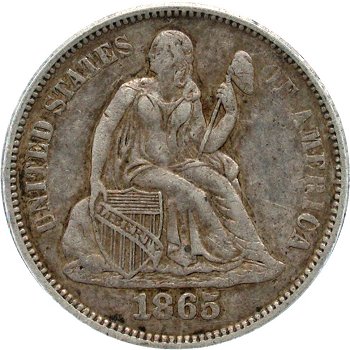
| 1865 | |||||
|
F-101a |
Ultimate Varieties |
 |
 |
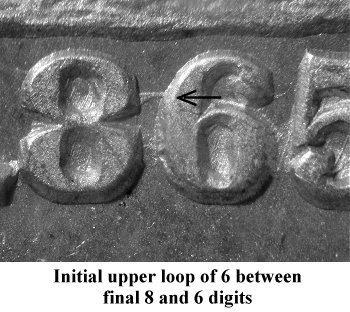 |
The top loop of a previously punched 6 is visible between the 8 and 6 digits. |
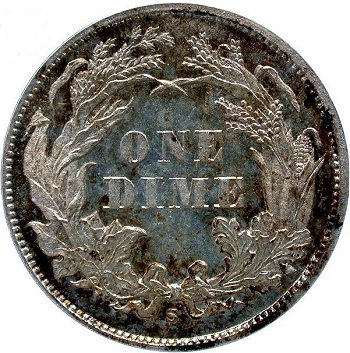
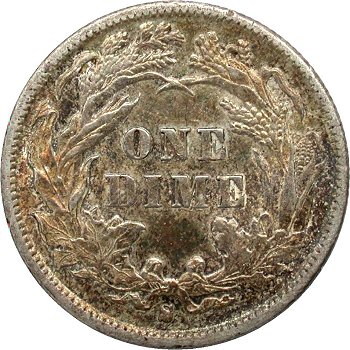
| 1865-S | |||||
|
F-103 |
|
 |
 |
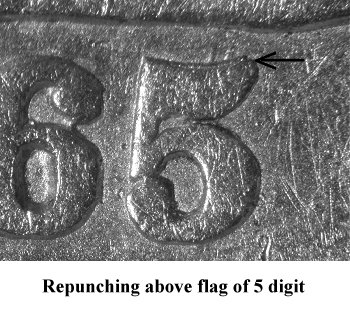 |
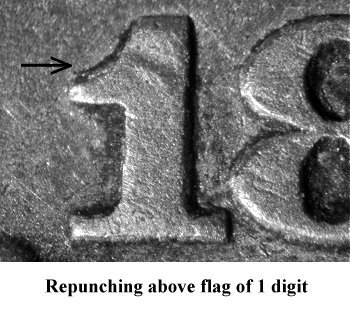
Repunching is seen above the flag of the 5 digit. |
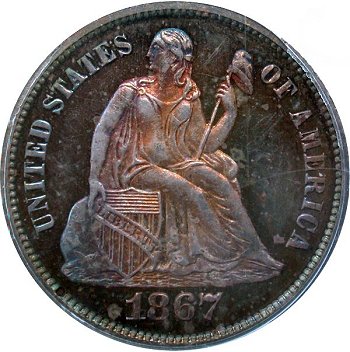
| 1867 | |||||
|
F-103 |
|
 |
 |
 |
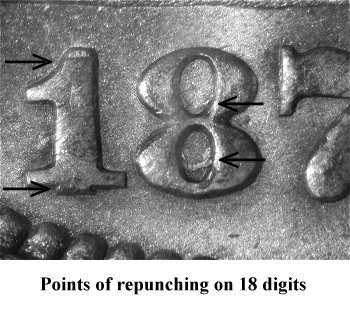
All 1867 proof dimes are found with repunching on the 1, 8 and 7 digits. |
| 1868 | |||||
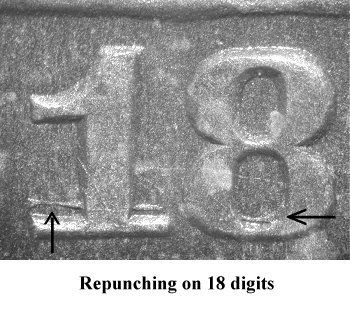
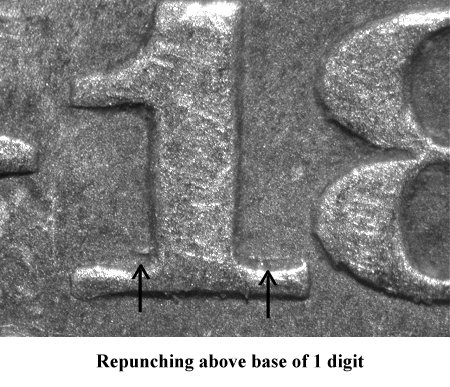
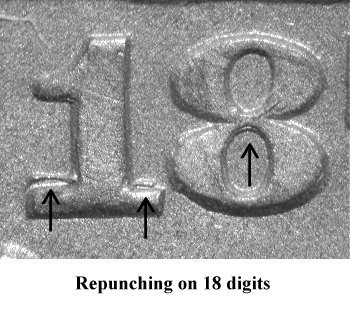
|
F-103 |
Top 100 Varieties Ultimate Varieties |
 |
 |
 |
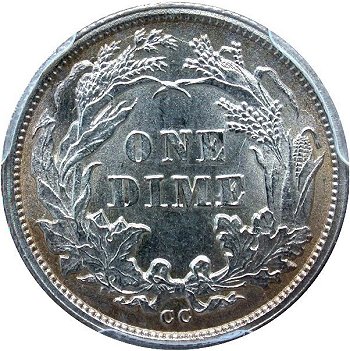
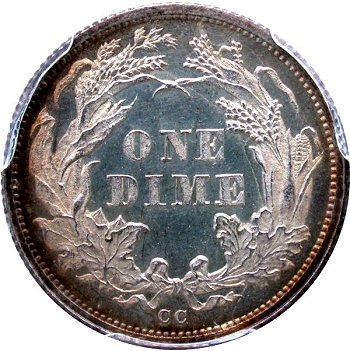
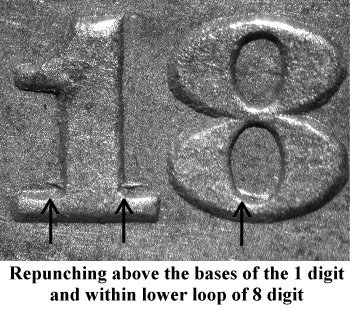
Repunching above the base of the 1 digit is easily seen and occasionally on the 8 digit. |
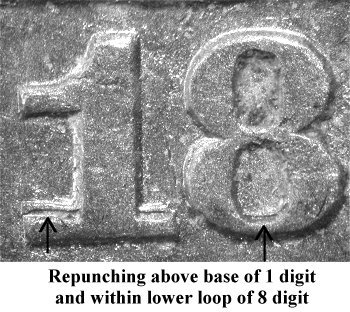
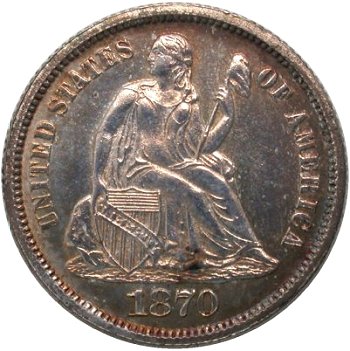
| 1870 | |||||
|
F-104 |
Top 100 Varieties Ultimate Varieties |
 |
 |
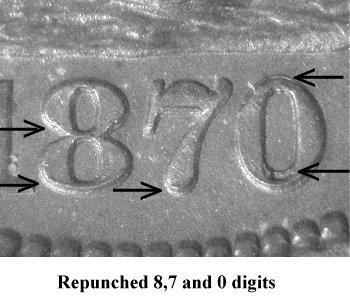 |
Repunching of the 0 digit is very obvious. This digit appears to have been triple punched with traces of prior digits above and below the final 0. |
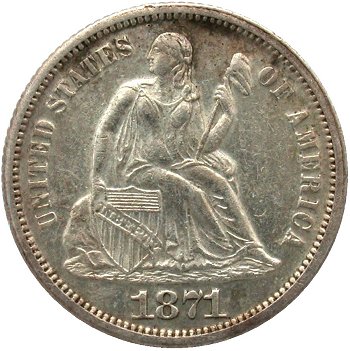
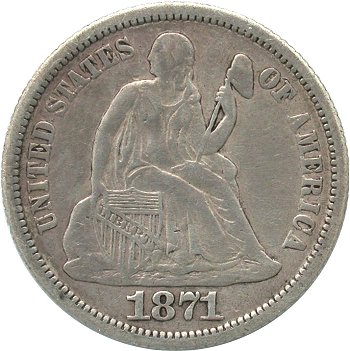
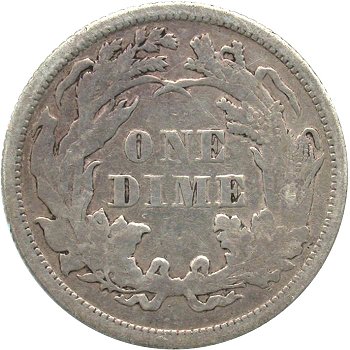
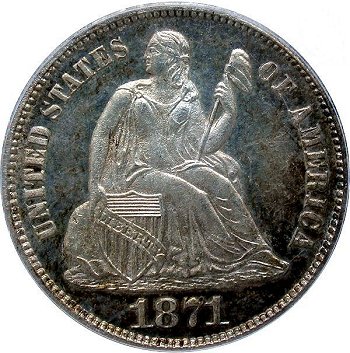
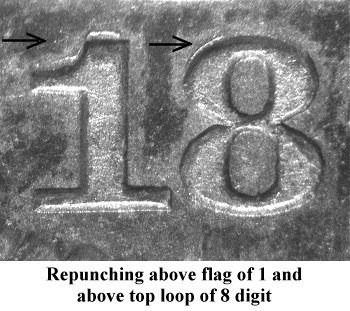
| 1871 | |||||
|
F-101 |
Top 100 Varieties Ultimate Varieties |
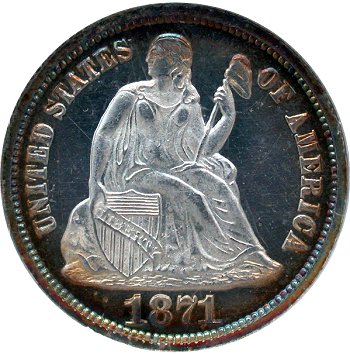 |
 |
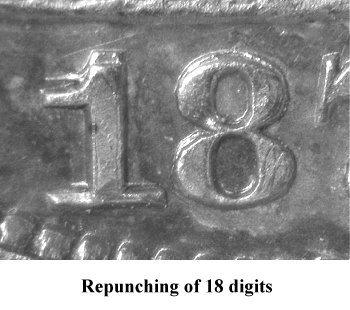 |
Proofs Only: Bold repunching is visible above the flag of the 1 digit and above the top loop of the 8 digit. |
|
F-106 |
|
 |
 |
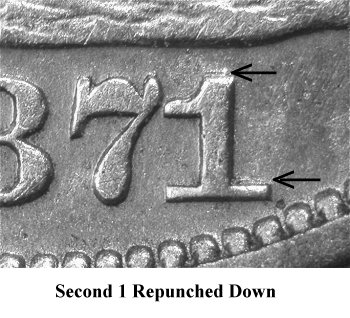 |
The second 1 digit shows traces of repunching above the flag and the right base. |
|
F-113 |
|
 |
 |
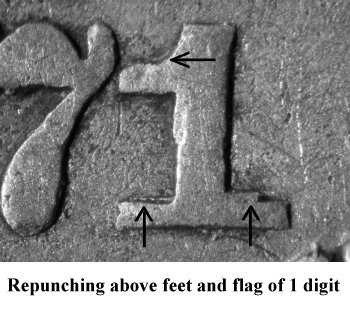 |
The second 1 digit is repunched above left and right feet and above the flag. |
| 1871-S | |||||
|
F-101 |
Ultimate Varieties |
 |
 |
 |
Repunching is seen above the flag of the 1 digit and above the top loop of the 8 digit. |
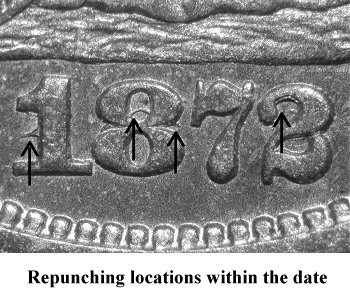
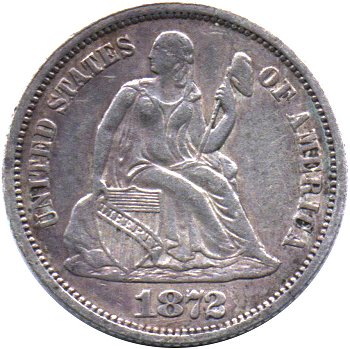
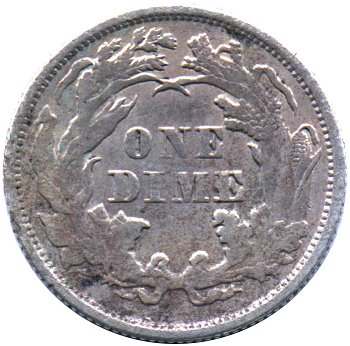
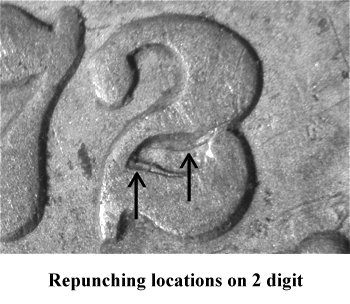
| 1872 | |||||
|
F-102 |
|
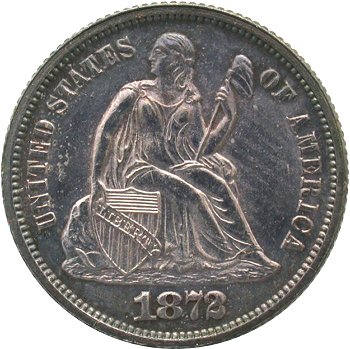 |
 |
 |
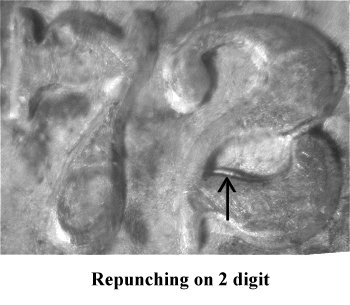
The 2 digit has been triple punched with the most obvious repunching seen within the upper loop of the digit. |
|
F-106 |
Top 100 Varieties Ultimate Varieties |
 |
 |
 |
Repunching is clearly seen within the 1, 8 and 2 digits. The original flag of the 1 digit is visible to the left of the upright of the final 1 punch. |
|
F-107 |
|
 |
 |
 |
Repunching is seen above the tops of the 7 and 2 digits. |
|
F-108 |
|
 |
 |
 |
The 2 digit is triple punched with repunching visible between the lower base and upper loop. |
|
F-114 |
|
 |
 |
 |
The 2 digit is repunched above the base. |
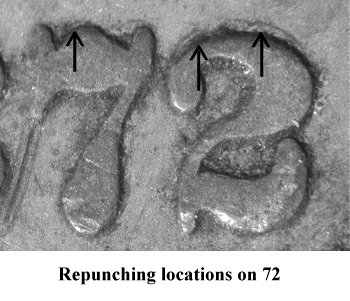
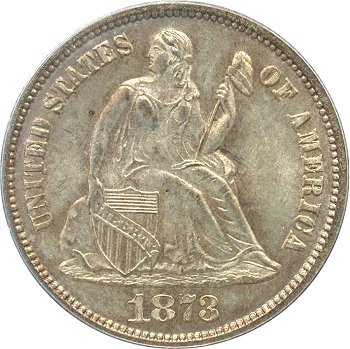
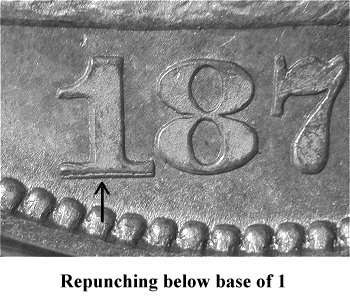
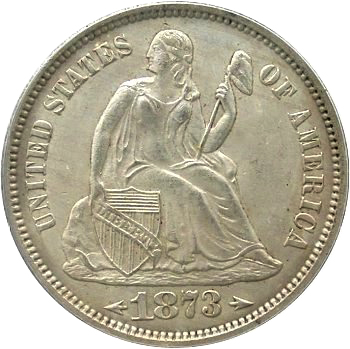
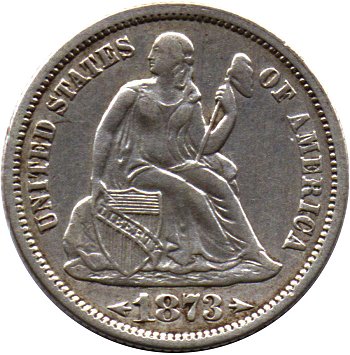
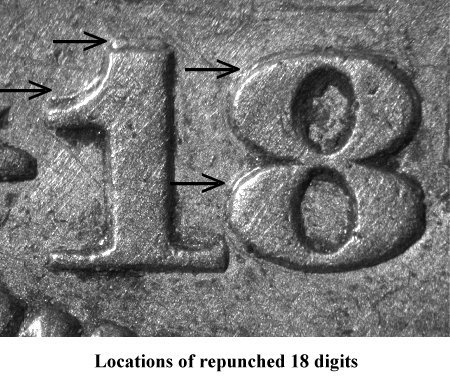
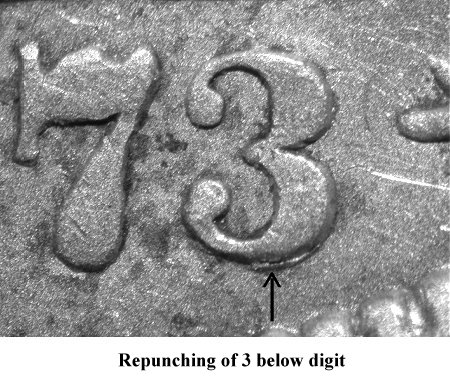
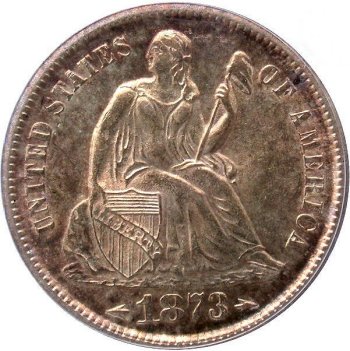
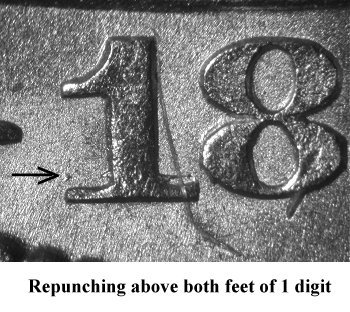
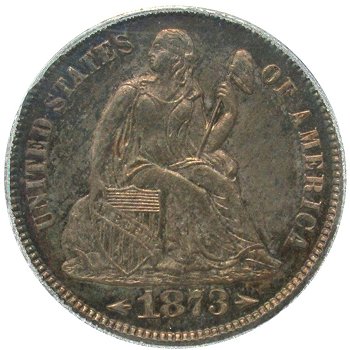
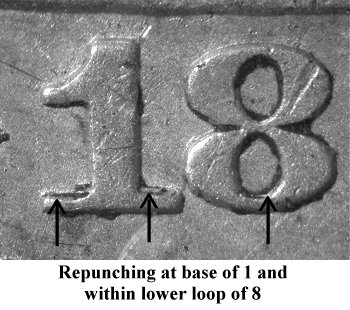
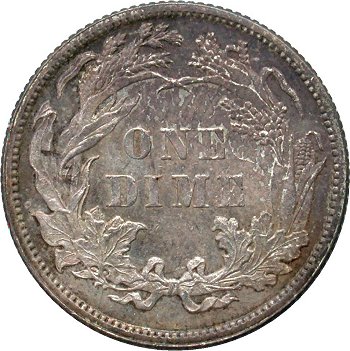
| 1873 Closed 3 | |||||
|
F-103 |
Top 100 Varieties Ultimate Varieties |
 |
 |
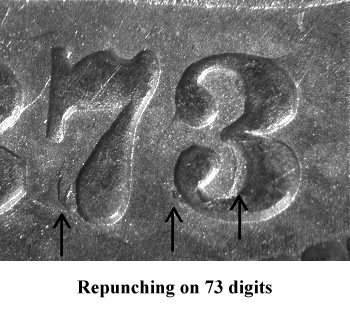 |
All digits in the date exhibit obvious repunching. Repunching is seen at the bottom left of each digit. |
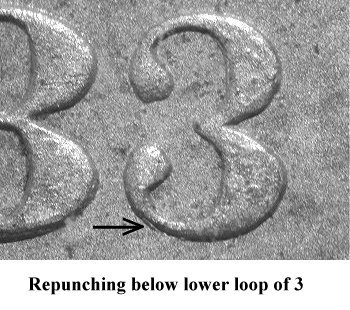
|
F-104 |
|
 |
 |
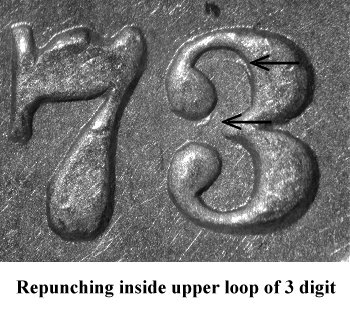 |
The repunching of the 3 digit is visible directly below the top upper loop. |
|
F-105 |
|
 |
 |
 |
The repunching under the base of the 1 digit is easily seen. |
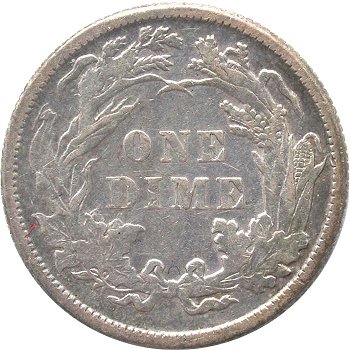
| 1873 With Arrows | |||||
|
F-104 |
|
 |
 |
 |
Faint repunching is visible above the left and right bases of the 1 digit. |
|
F-105 |
Ultimate Varieties |
 |
 |
 |
Repunching is visible above the flag and above the top of the 1 upright. The 8 digit also shows repunching at the top left of the lower and upper loops. |
|
F-106 |
|
 |
 |
 |
Repunching below the base of the 3 digit should be easily seen. |
| 1873-S With Arrows | |||||
|
F-101 |
Ultimate Varieties |
 |
 |
 |
Repunching is visible above the left and right feet of the 1 digit. |
|
F-102 |
Ultimate Varieties |
 |
 |
 |
Repunching is visible above the left and right bases of the 1. Traces of repunching can be found within the lower loop of the 8 digit. |
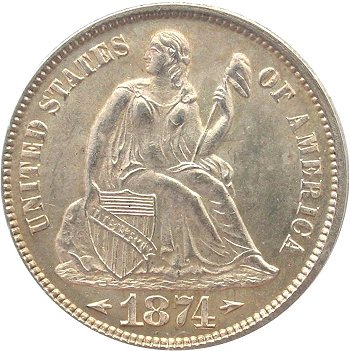
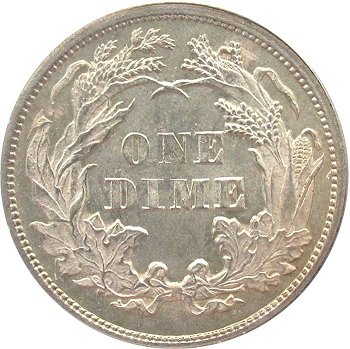
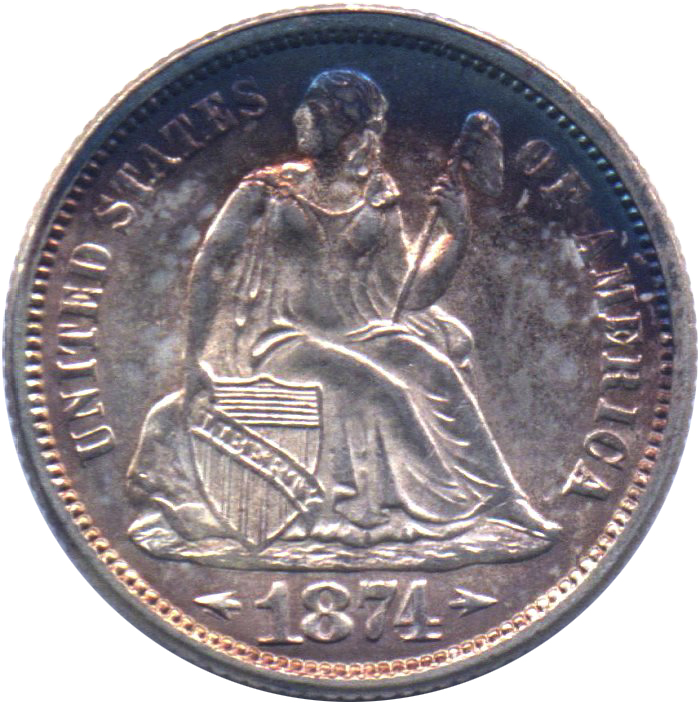
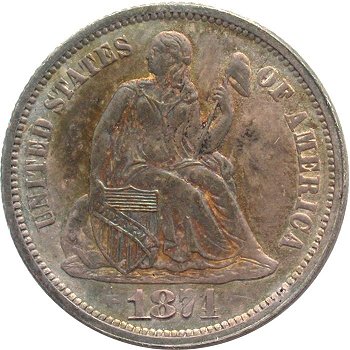
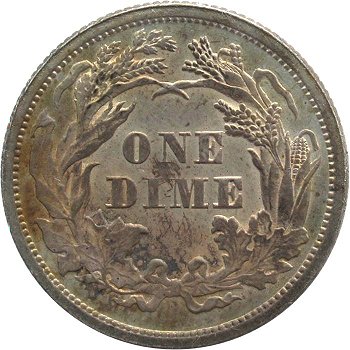
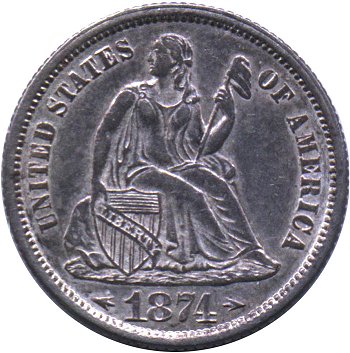
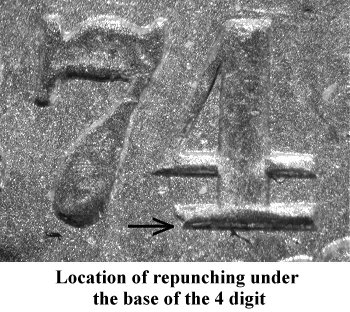
| 1874 With Arrows | |||||
|
F-103 |
Top 100 Varieties Ultimate Varieties |
 |
 |
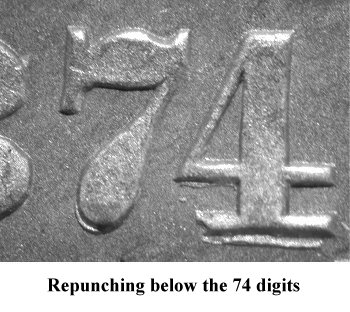 |
Repunching is seen below the base of the 7 and 4 digits. |
|
F-104 |
|
 |
 |
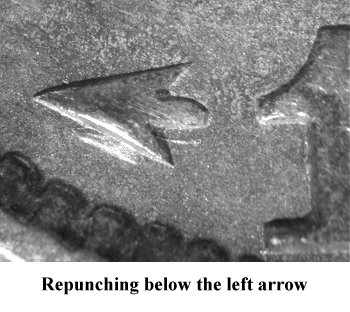 |
Repunching is clearly visible below the left arrow. |
|
F-105 |
|
 |
 |
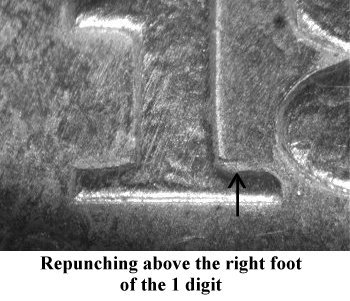 |
The 1 digit is repunched, with traces of repunching visible above the right foot. |
|
F-106 |
|
 |
 |
 |
All date digits are repunched. This variety is better known as the "missing" arrows obverse. |
|
F-107 |
|
 |
 |
 |
Repunching is seen below the base of the 1 and 4 digits |
|
F-111 |
|
 |
 |
 |
Faint repunching is visible under the lower edges of the top loop of the 8 digit. |
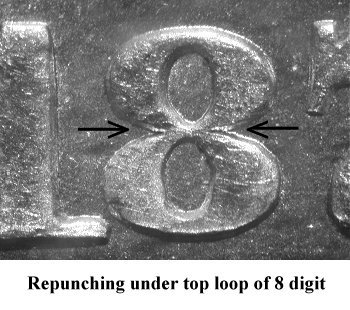
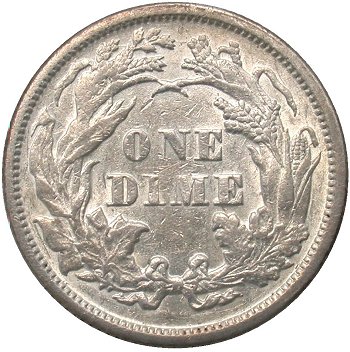
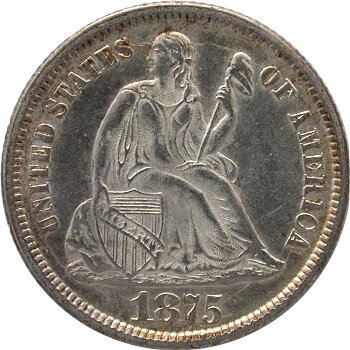
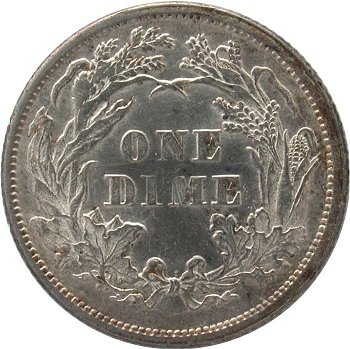
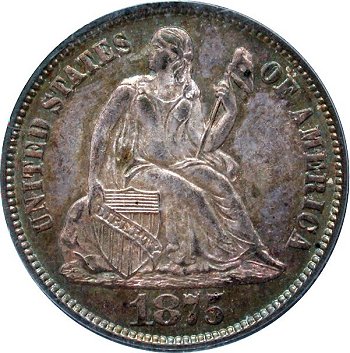
| 1875 | |||||
|
F-105 |
Ultimate Varieties |
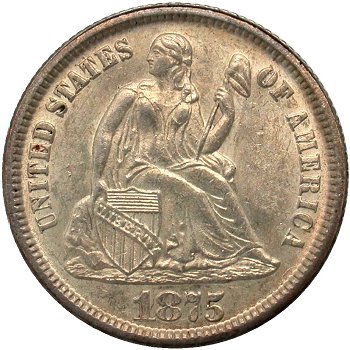 |
 |
 |
The 1 and 8 digits are repunched below the base and the flag of the 1 digit and at the left hand side of the top outer loop of the 8 digit |
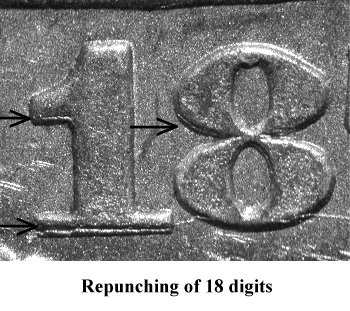
|
F-108 |
Ultimate Varieties |
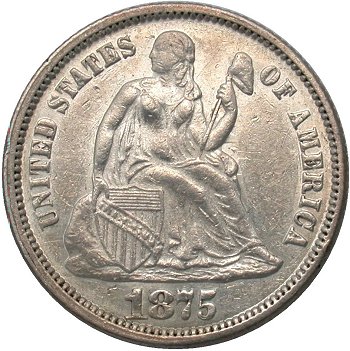 |
 |
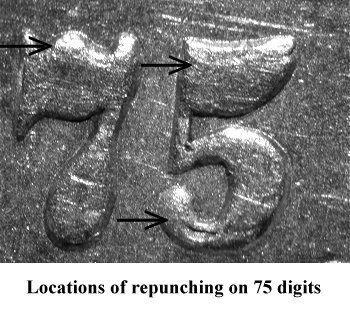 |
Obvious repunching is seen on the lower loop and ball of the 5 digit. Additional repunching is noted on top of 7 and 5 digits. |
|
F-109 |
|
 |
 |
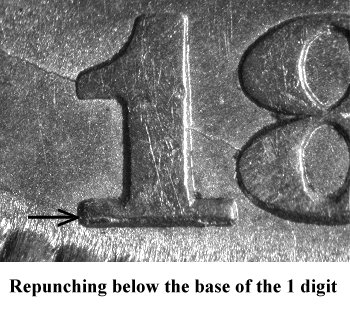 |
The 1 digit shows repunching beneath the base. |
|
F-111 |
|
 |
 |
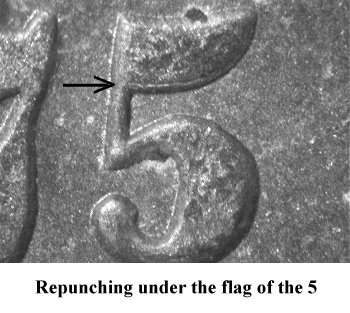 |
The 5 digit shows repunching beneath the flag. |
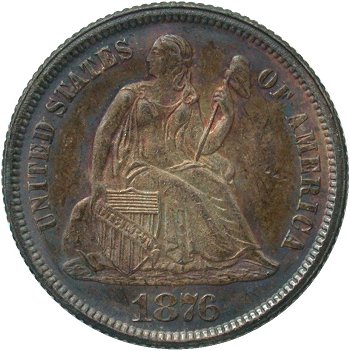
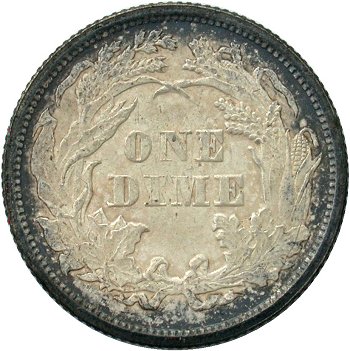
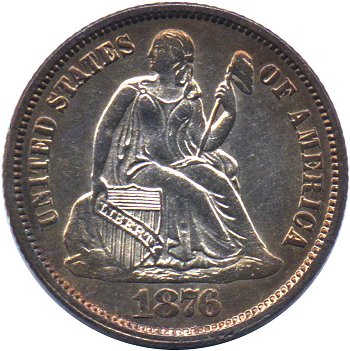
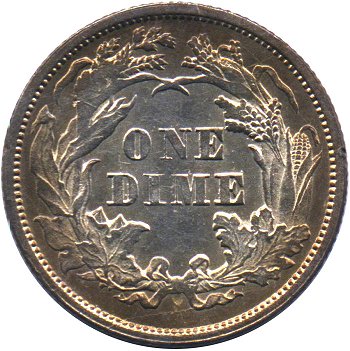
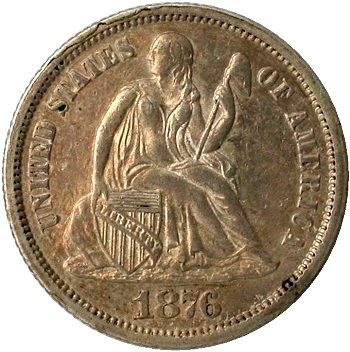
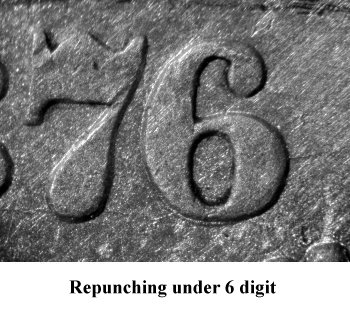
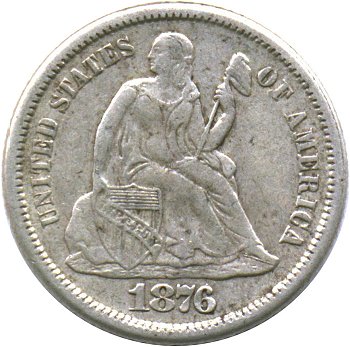
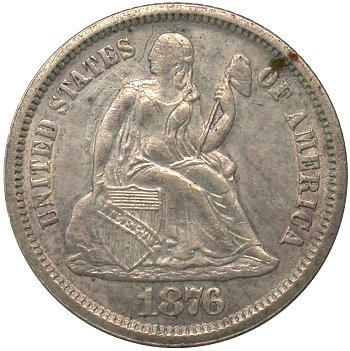
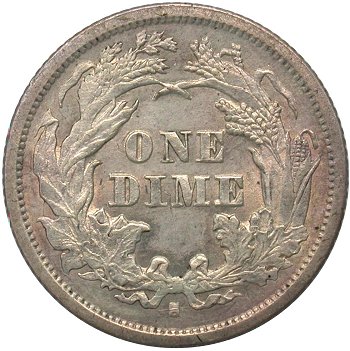
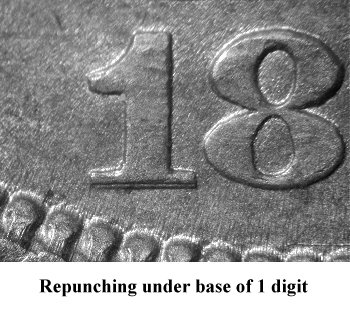
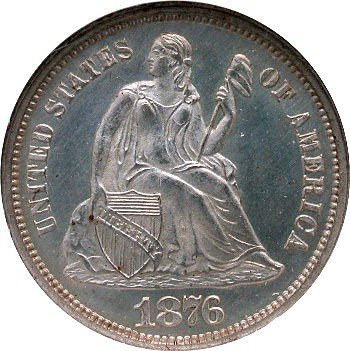
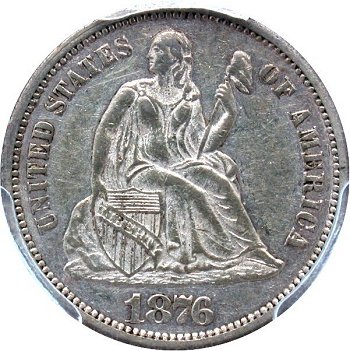
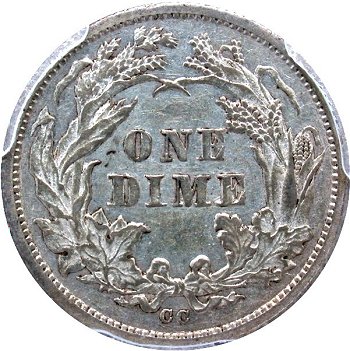
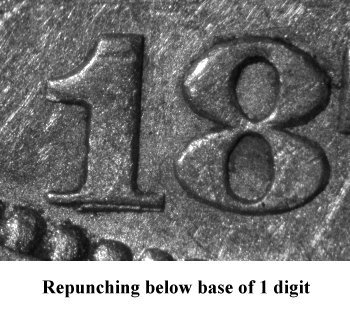
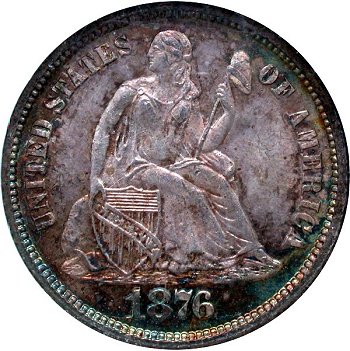
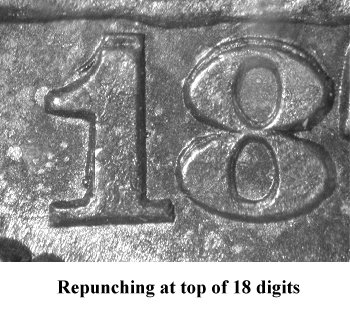
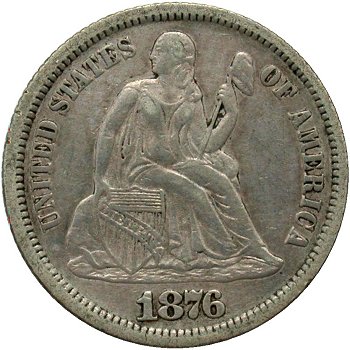
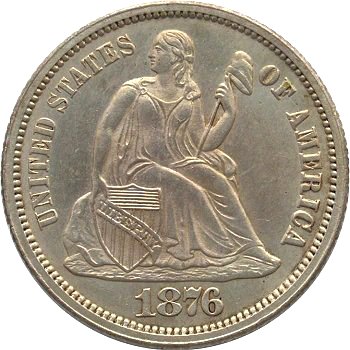
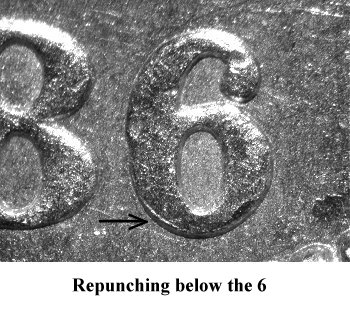
| 1876 | |||||
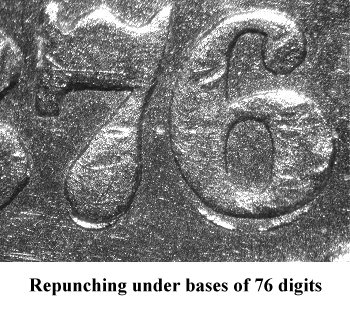
|
F-105
Type I Reverse |
|
 |
 |
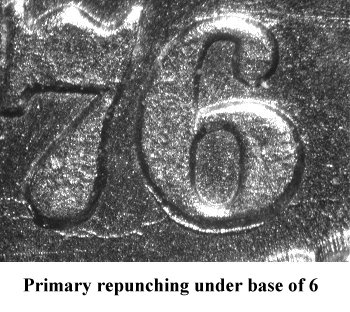 |
Repunched is primarily seen under the 6 digit. |
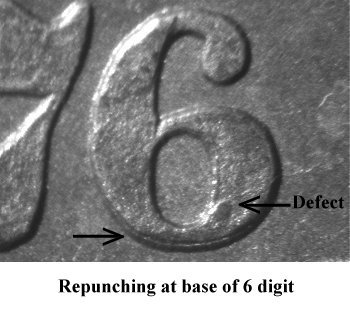
|
F-106
Type I Reverse |
|
 |
 |
 |
The repunching is very evident under both the 7 and 6 digits. |
|
F-109
Type I Reverse |
|
 |
 |
 |
The 6 digit is repunched with traces of the prior digit being visible at the base. |
|
F-115
Type I Reverse |
|
 |
 |
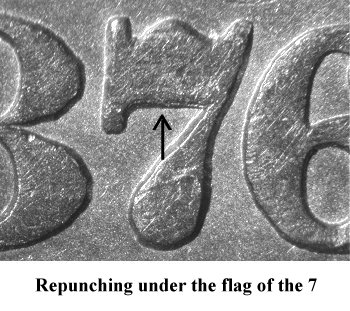 |
There is repunching under the flag of the 7 digit. |
|
F-120
Type I Reverse |
|
 |
 |
 |
Repunching is seen below the 6 digit and above the left and right base of the 1 digit. |
| 1876-S | |||||
|
F-101
Type I Reverse |
Top 100 Varieties Ultimate Varieties |
 |
 |
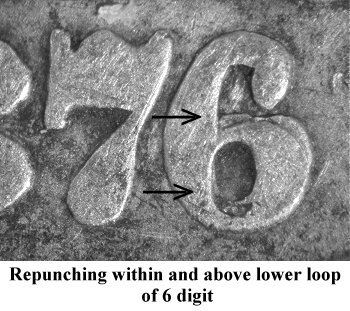 |
Repunching is evident below the flag and base of the 1 digit and within and above the lower loop of the 6 digit. |
|
F-102
Type I Reverse |
|
 |
 |
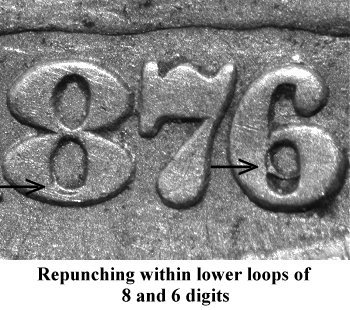 |
Repunching is visible in the lower loops of the 8 and 6 digits. |
|
F-120
Type I Reverse |
|
 |
 |
 |
Repunching is seen under the base of the 1 digit. |
| 1876-CC | |||||
|
F-103
Type I Reverse |
|
 |
 |
 |
There is repunching about the 1 digit's upright and flag. |
|
F-109
Type I Reverse |
|
 |
 |
 |
There is repunching below the base of the 1 digit. |
|
F-110
Type I Reverse |
Top 100 Varieties Ultimate Varieties |
 |
 |
 |
Strong repunching is seen above the 1 and 8 digits. |
|
F-122
Type I Reverse |
|
 |
 |
 |
Repunching is seen above the flag of the 1 digit. |
|
F-101
Type II Reverse |
Top 100 Varieties Ultimate Varieties |
 |
 |
 |
Repunching on the 6 digit is seen below the base. There is also faint repunching below the upper and middle loops. This repunching is not seen on all Type II reverse dimes. |
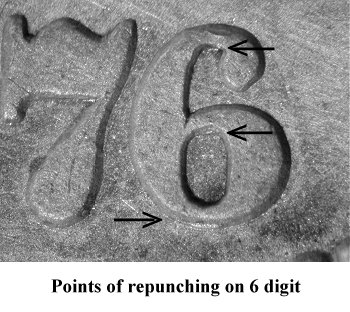
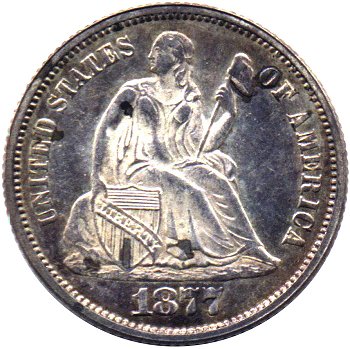
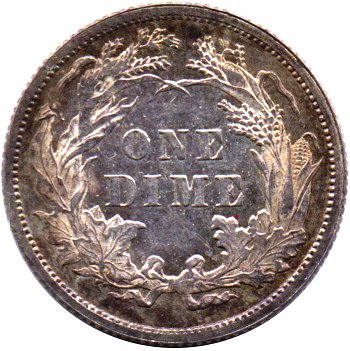
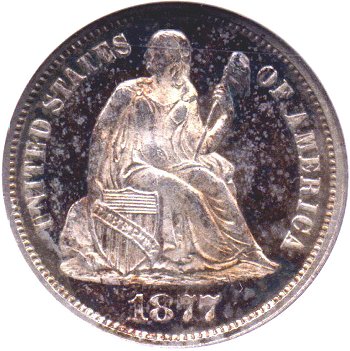
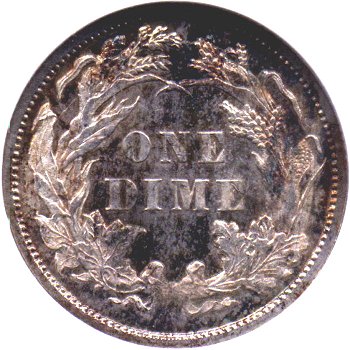
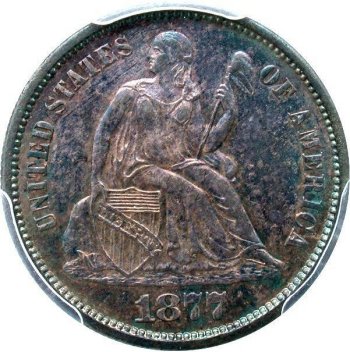
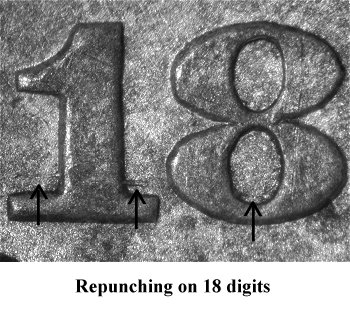
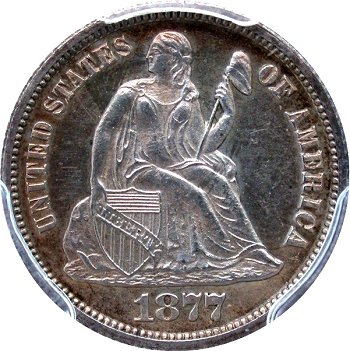
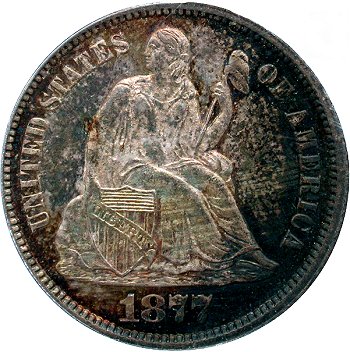
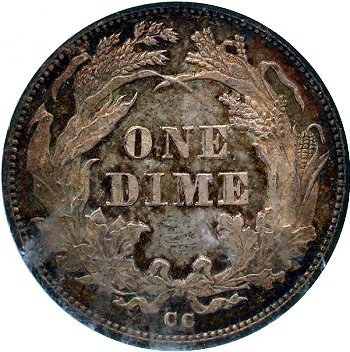
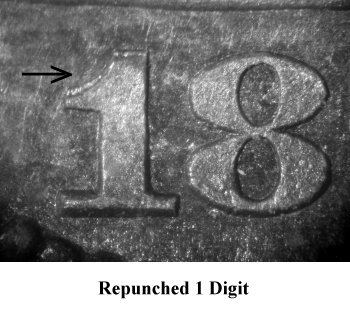
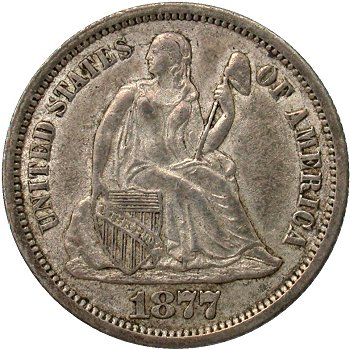
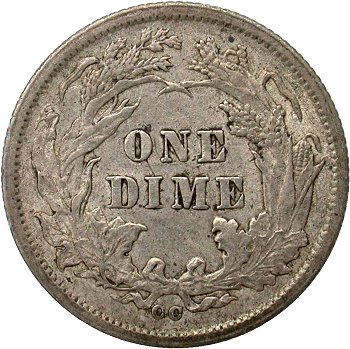
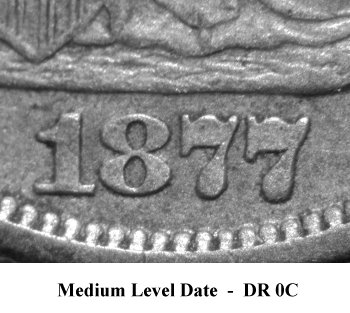
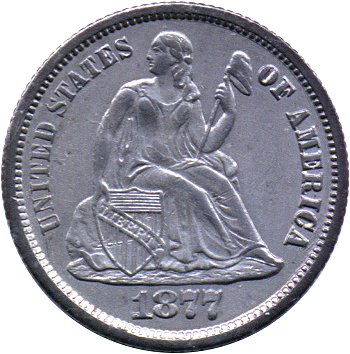
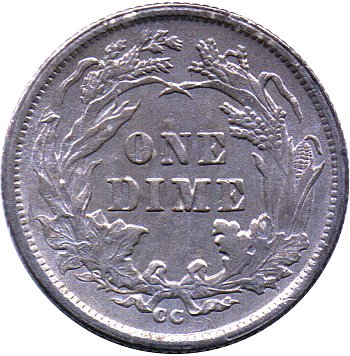
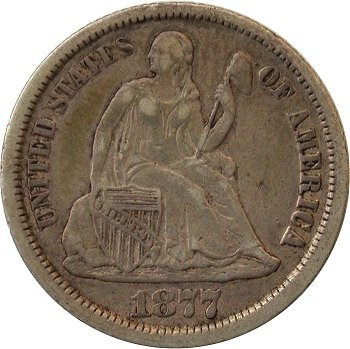
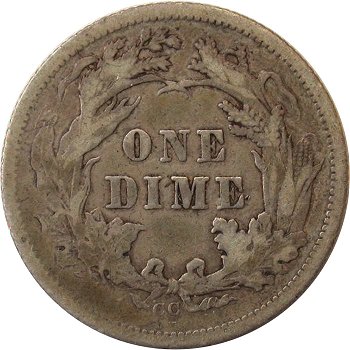
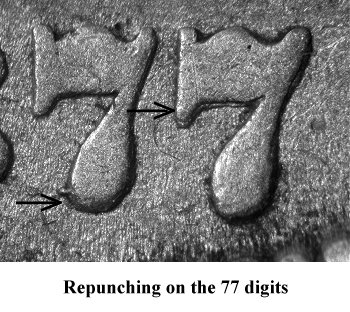
| 1877 | |||||
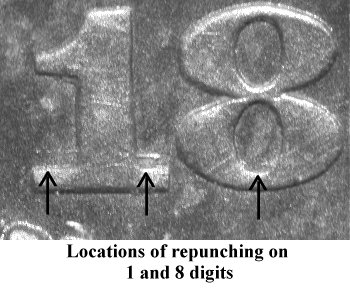
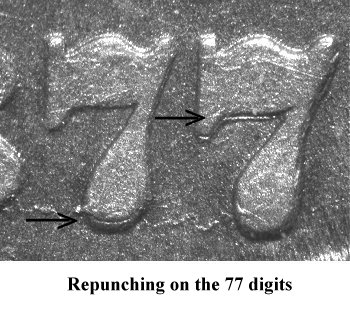
|
F-104
Type II Reverse |
|
 |
 |
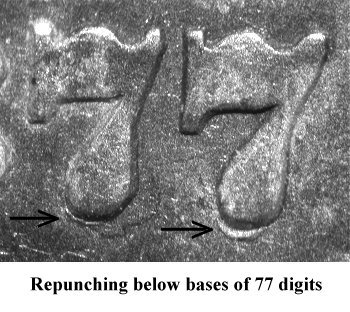 |
There is repunching below the 77 digit in the date. |
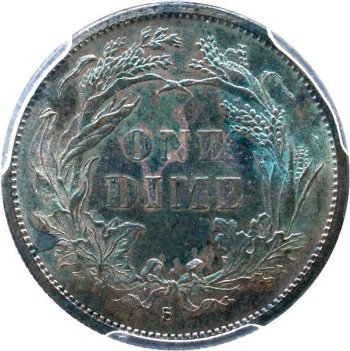
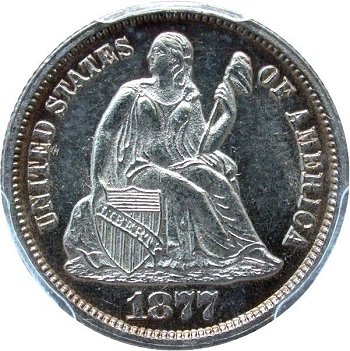
|
F-108
Type II Reverse |
|
 |
 |
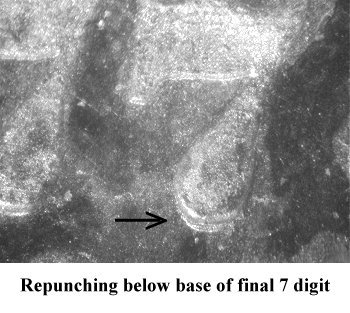 |
Repunching is seen below the last 7 digit in the date. |
| 1877-S | |||||
|
F-101
Type II Reverse |
Top 100 Varieties Ultimate Varieties |
 |
 |
 |
Repunching is visible above the left and right feet of 1 digit and within the lower loop of the 8 digit. |
|
F-102
Type II Reverse |
|
 |
 |
 |
Faint repunching is visible above the left and right feet of 1 digit and within the lower loop of the 8 digit. This second die pairing with obverse die. |
| 1877-CC | |||||
|
F-104
Type I Reverse |
Ultimate Varieties |
 |
 |
 |
The 1 digit shows repunching above the flag and the last 7 digit has obvious repunching below the base. |
|
F-105
Type I Reverse |
|
 |
 |
 |
Repunching is most visible above the left and right feet of the 1 digit and within the bottom of the lower loop of the 8 digit. |
|
F-109
Type I Reverse |
|
 |
 |
 |
The 1 digit shows repunching above the flag and the last 7 digit has obvious repunching below the base. |
|
F-106
Type II Reverse |
|
 |
 |
 |
The 1 digit shows repunching. A macro image of the repunching is required. |
|
F-107
Type II Reverse |
Top 100 Varieties Ultimate Varieties |
 |
 |
 |
Obvious repunching is seen above the base of the 1 digit and under the flag and at the bottom of the second 7 digit. |
|
F-109
Type II Reverse |
|
 |
 |
 |
The 77 digits are repunched multiple times. Please check the web-book listing for details. |
|
F-116
Type II Reverse |
|
 |
 |
 |
The 77 digits are repunched multiple times but primary area seen for this die pairing is below the flag of final 7 digit. |
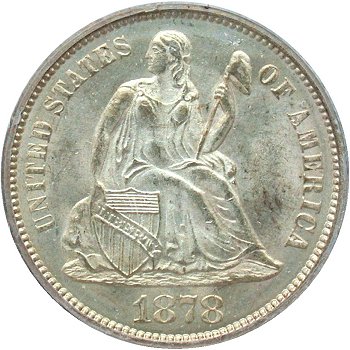
| 1878 | |||||
|
F-102
Type II Reverse |
Ultimate Varieties |
 |
 |
 |
The 1 digit is repunched with repunching seen under the flag and the base. |
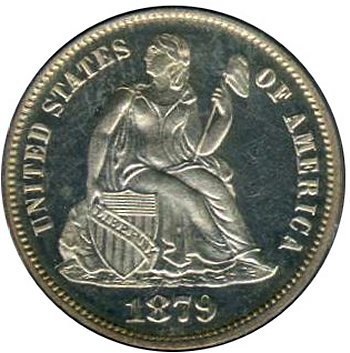
| 1879 | |||||
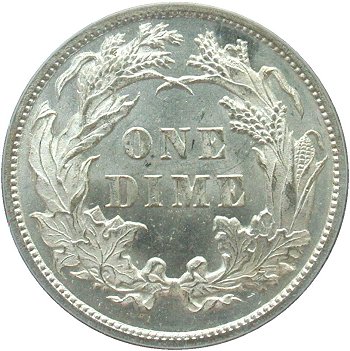
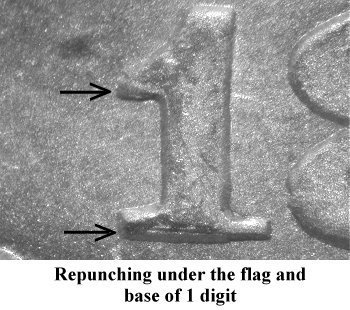
|
F-103
|
|
 |
 |
|
Proof Strikes; The 9 digit shows repunching above and within the lower loop. |
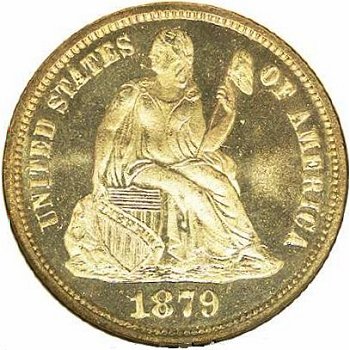
|
F-104 |
|
 |
 |
 |
Proof Strikes; The 1 digit shows repunching above the upright and below the base. On the 8 digit, repunching can be seen in the bottom of the upper and lower loops. |
|
F-104a |
Ultimate Varieties |
 |
 |
|
Business Strikes; The 1 digit shows repunching above the upright and below the base. On the 8 digit, repunching can be seen in the bottom of the upper and lower loops. |
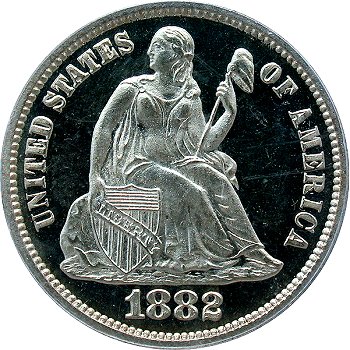
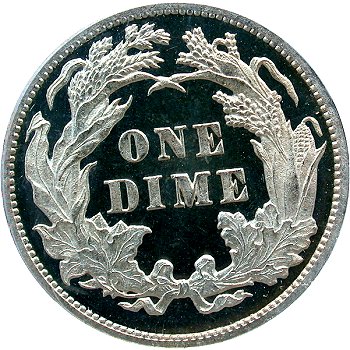
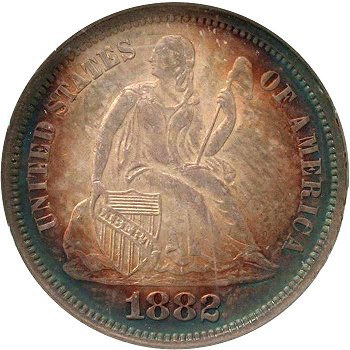
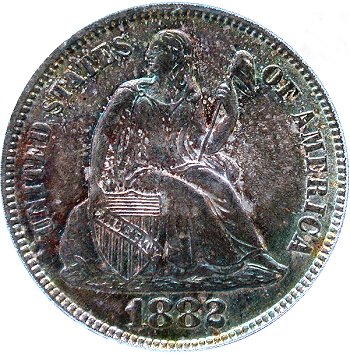
| 1882 | |||||
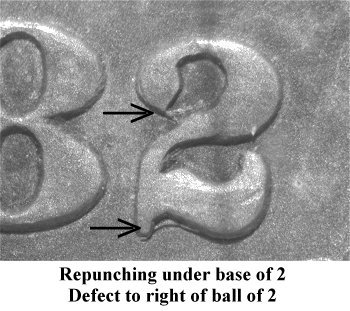
|
F-101 |
|
 |
 |
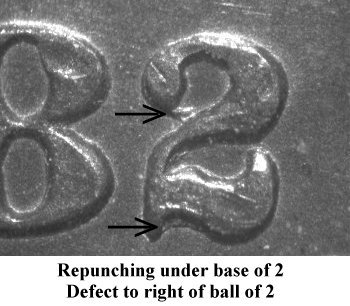 |
Proof Strikes; Repunching is visible under the base of the 2 digit. |
|
F-101a |
|
 |
 |
 |
Business Strikes; Repunching is visible under the base of the 2 digit. |
|
F-102 |
Top 100 Varieties Ultimate Varieties |
 |
 |
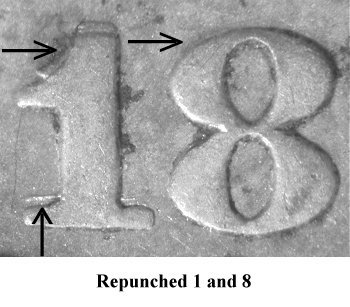 |
Repunching of the 1 digit is seen above the flag and above the left and right feet. Minor repunching is seen at the top of the upper loop of the 8 digit. |
|
F-105 |
|
 |
 |
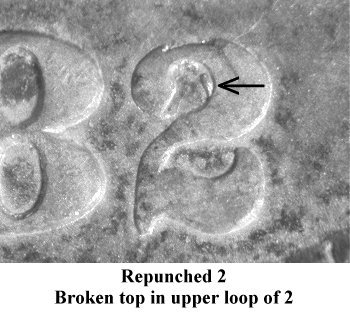 |
The 2 digit shows repunching within the right side of the upper loop. |
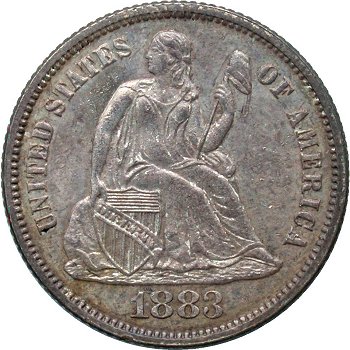
| 1883 | |||||
|
F-109 |
|
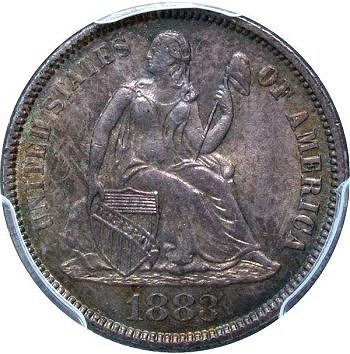 |
 |
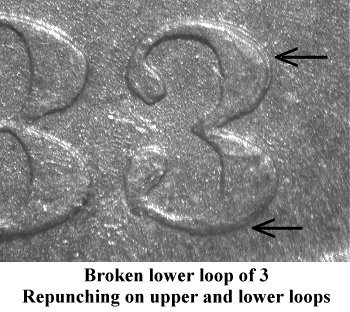 |
Minor repunching on the 3 digit is found on the outer right side of the upper loop and below the base of the lower loop. |
|
F-110 |
|
 |
 |
 |
Minor repunching is seen below the lower loop of the 3 digit. |
|
F-120 |
|
 |
 |
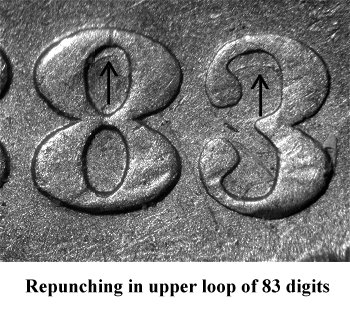 |
Repunching is seen within the upper loops of the 8 and 3 digits. |
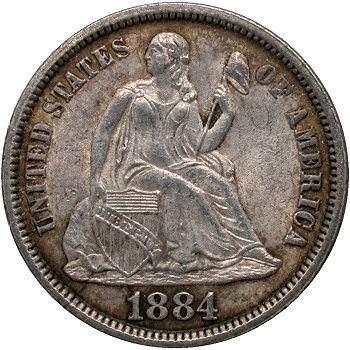
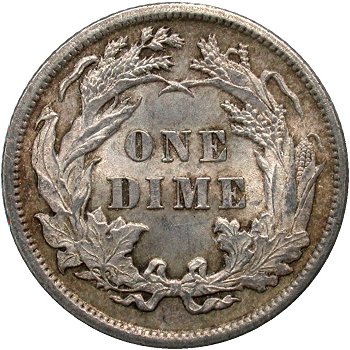
| 1884 | |||||
|
F-103 |
Ultimate Varieties |
 |
 |
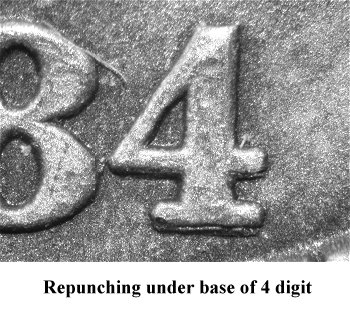 |
Obvious repunching is seen below the base of the 4 digit. Secondary repunching is seen above the flag of the 1 digit. |
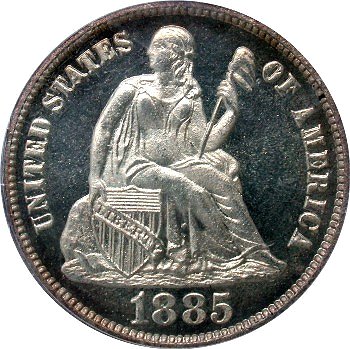
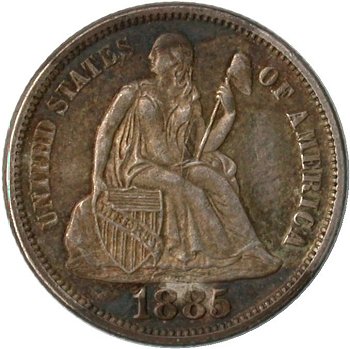
| 1885 | |||||
|
F-101 |
|
 |
 |
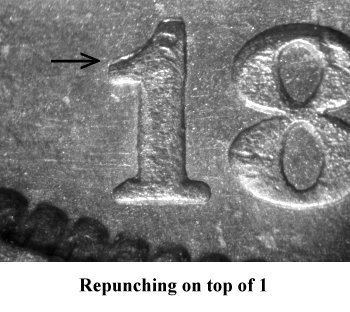 |
Proof Strikes; Repunching is visible above the flag of the 1 digit. |
|
F-101a |
|
 |
 |
 |
Business Strikes; Repunching is visible above the flag of the 1 digit. |
|
F-105 |
Ultimate Varieties |
 |
 |
 |
Bold repunching is visible on both the 1 and 8 digits. The repunching on the 1 digit is seen above the flag and below the base while the 8 digit shows repunching above the top loop. |
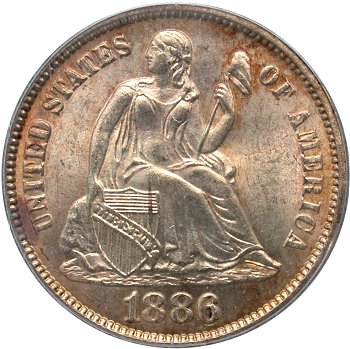
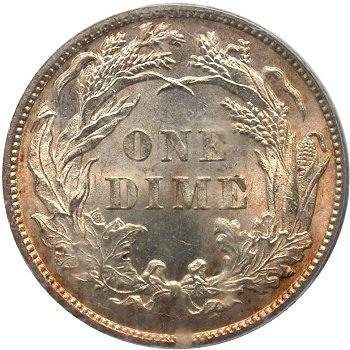
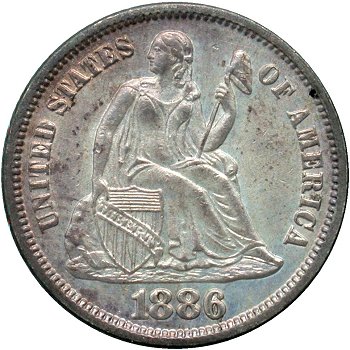
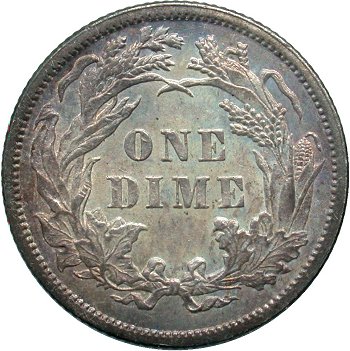
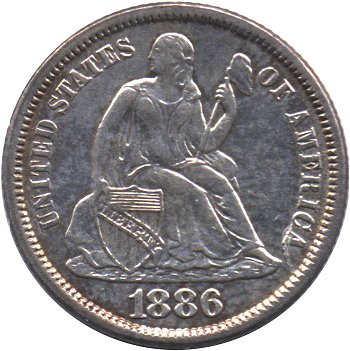
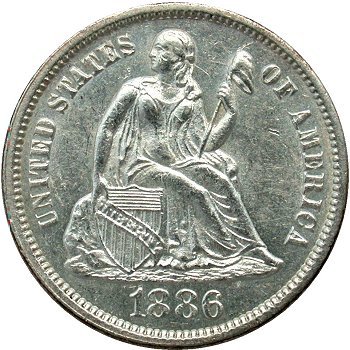
| 1886 | |||||
|
F-105 |
Top 100 Varieties Ultimate Varieties |
 |
 |
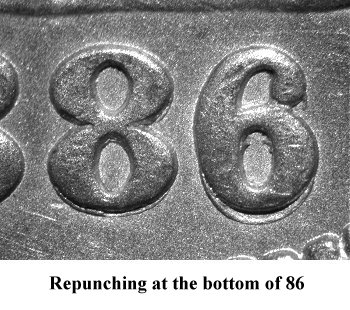 |
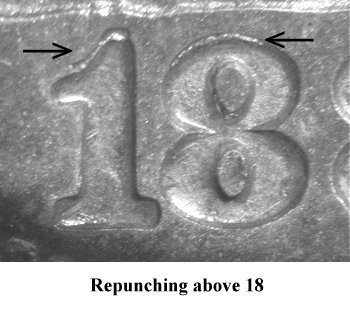
There is bold repunching under the base of the 6 digit and weaker repunching under the 8 digit. |
|
F-106 |
|
 |
 |
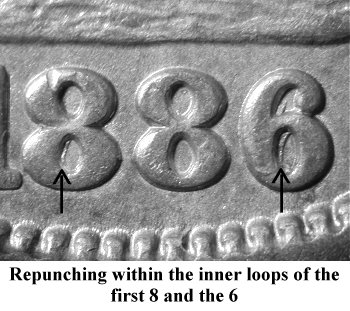 |
Repunching is typically visible within the left inner loops of the 6 digit and to a less extent, within the lower inner loop of the first 8 digit. |
|
F-107 |
Ultimate Varieties |
 |
 |
 |
Repunching is clearly seen above the flag of the 1 digit and the upper loop of the 8 digit and below the base of the 6 digit. |
|
F-109 |
|
 |
 |
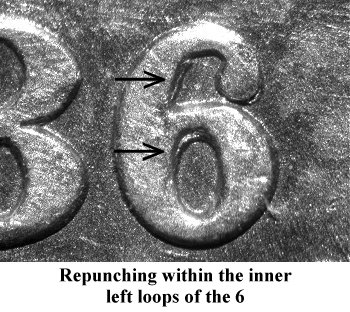 |
Repunching is visible within the inner left loops of the 6 digit. |
|
F-110 |
|
 |
 |
 |
Repunching is seen directly below the left section of the bottom loop of the 6 digit. |
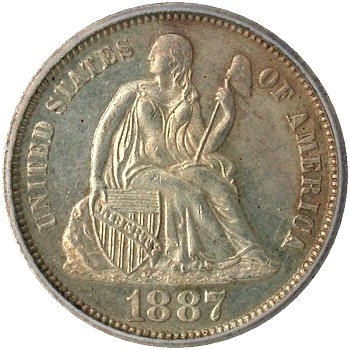
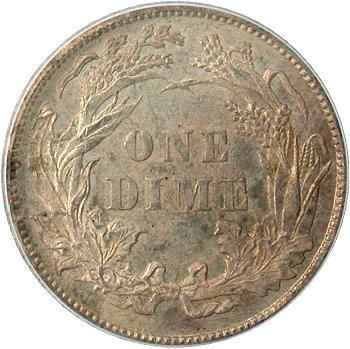
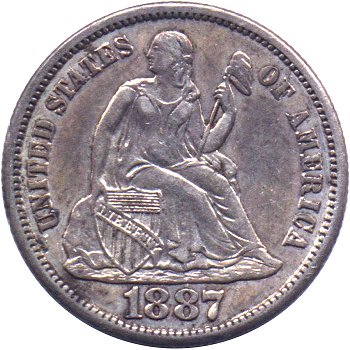
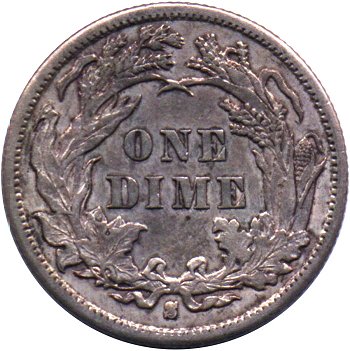
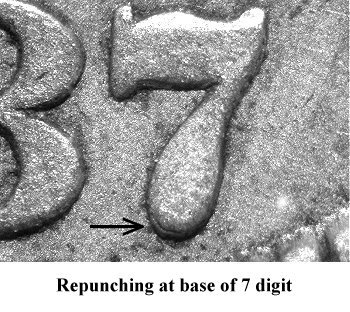
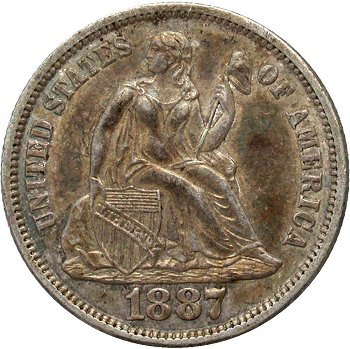
| 1887 | |||||
|
F-103 |
|
 |
 |
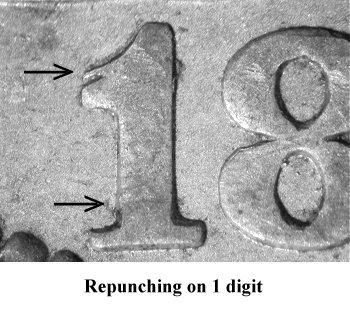 |
There is bold repunching above the flag of the 1 digit and below the 7 digit. |
|
F-116 |
|
 |
 |
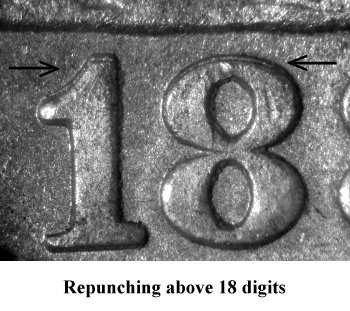 |
Repunching is seen about the flag of the 1 digit and above the top loop of the 8 digit. |
| 1887-S | |||||
|
F-102 |
|
 |
 |
 |
Repunching is seen below the base of the 7 digit. |
|
F-106 |
|
 |
 |
 |
Repunching is seen above the flag of the 1 digit. |
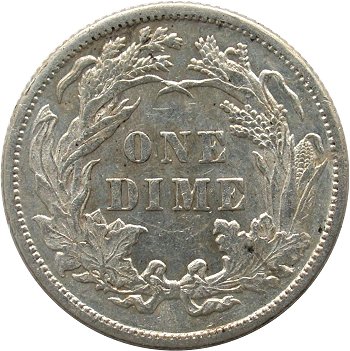
| 1888 | |||||
|
F-104 |
|
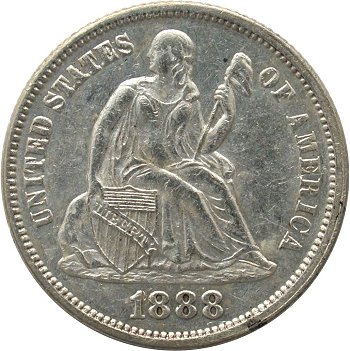 |
 |
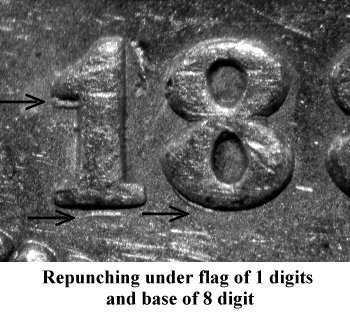 |
Repunching is visible below the flag and the base of the 1 digit and at the bottom of the lower loop of the 8 digit. |
|
F-105 |
Ultimate Varieties |
 |
 |
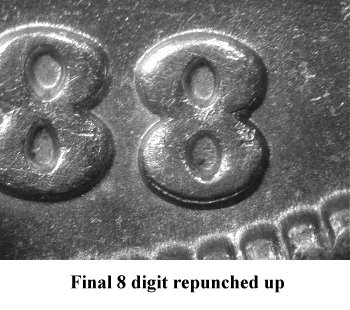 |
Repunching is clearly visible under the lower loop of the final 8 digit. |
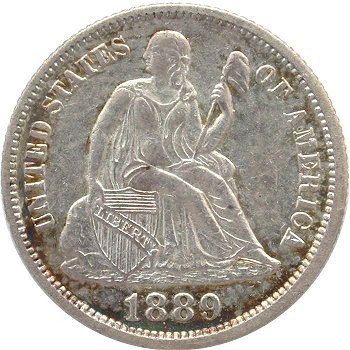
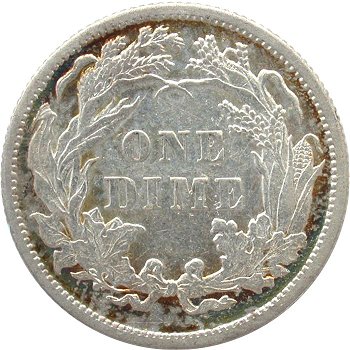
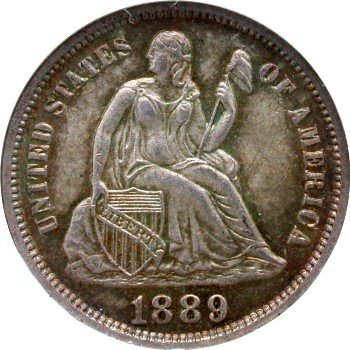
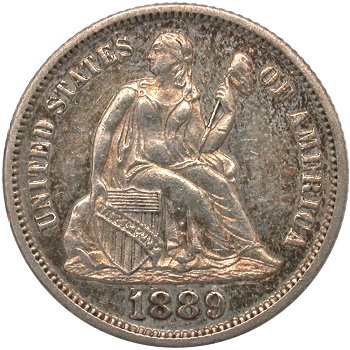
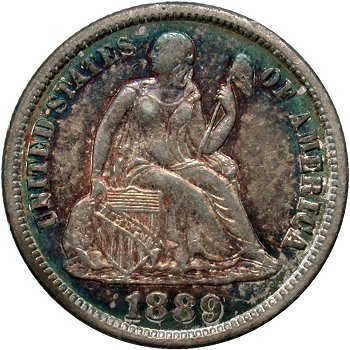
| 1889 | |||||
|
F-103 |
Top 100 Varieties Ultimate Varieties |
 |
 |
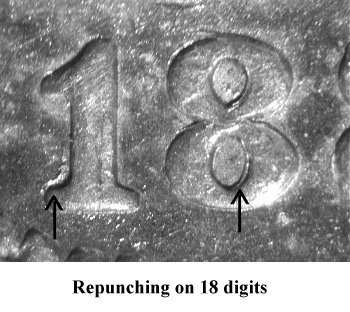 |
All four date digits are repunched. Repunching is seen above the left foot of the 1 digit and within the lower loop of the 8 digit. Additional repunching can be found below the lower loop of the 8 digit and above the tail of the 9 digit. |
|
F-104 |
Top 100 Varieties Ultimate Varieties |
 |
 |
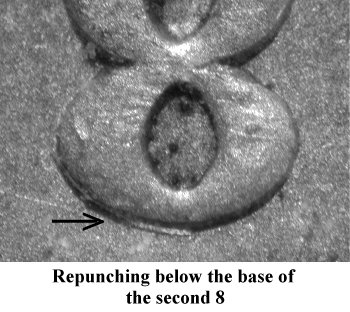 |
Repunching is seen under the left base of the second 8 digit. |
|
F-110 |
|
 |
 |
 |
The last three digits are repunched. Repunching is seen within the lower loops of both 8 digits and above the tail of the 9 digit. |
|
F-125 |
|
 |
 |
 |
Faint repunching is seen above the flag of the 1 digit. |
| 1889-S | |||||
|
F-102 |
Ultimate Varieties |
 |
 |
 |
There is a minor repunching visible above the flag of the 1 digit. |
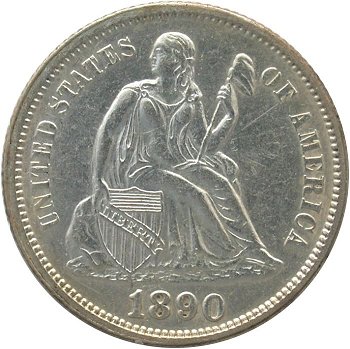
| 1890 | |||||
|
F-109 |
|
 |
 |
 |
Repunching is seen below the flag of the 1 digit. |
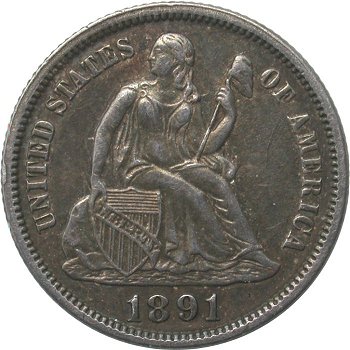
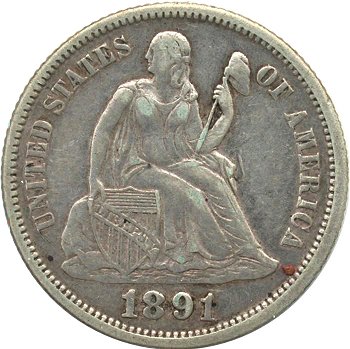
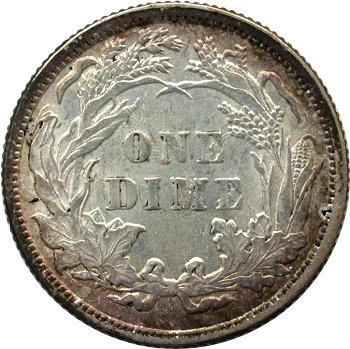
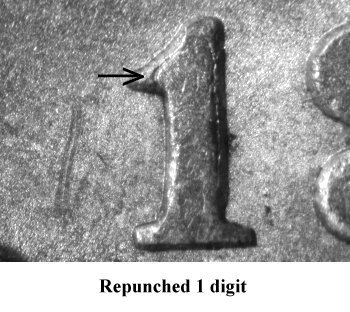
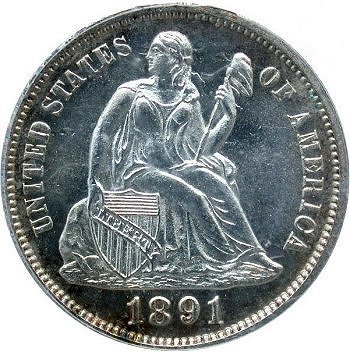
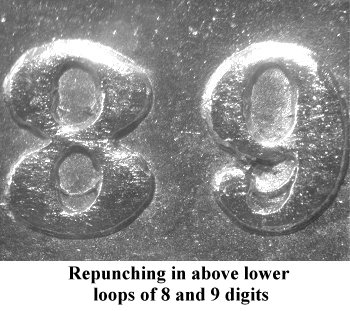
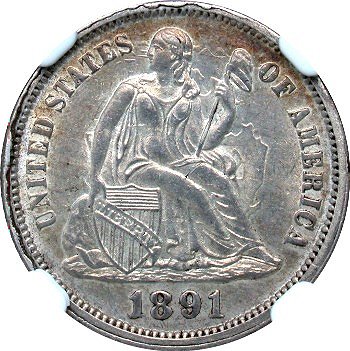
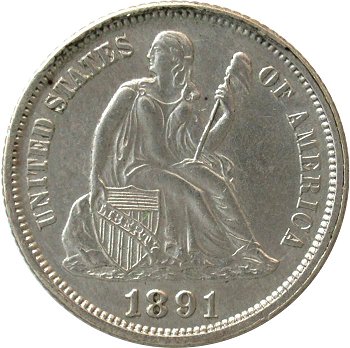
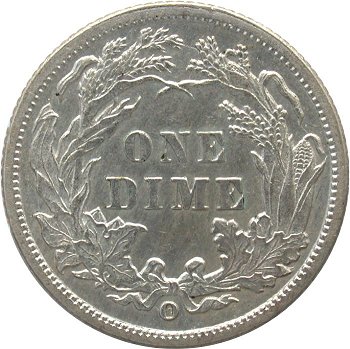
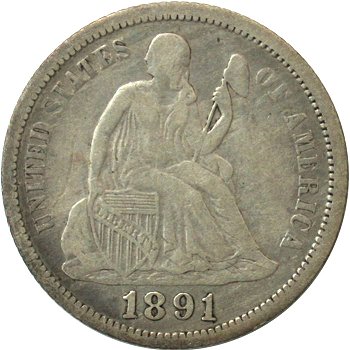
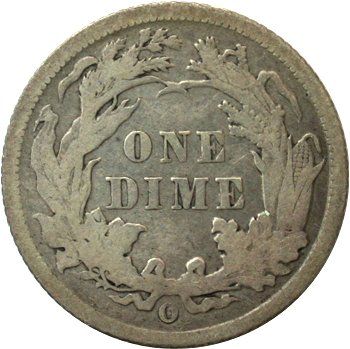
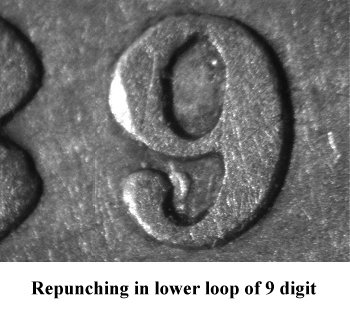
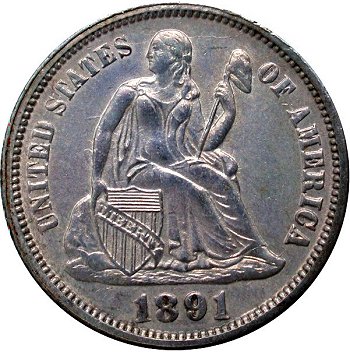
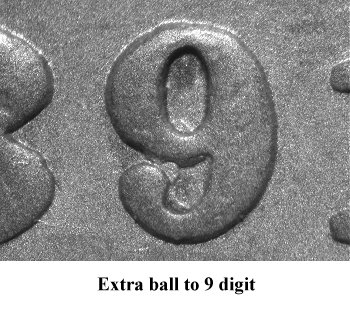
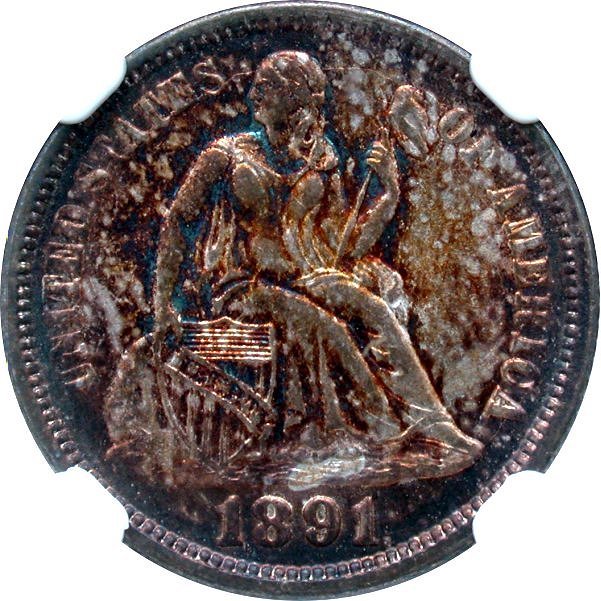
| 1891 | |||||
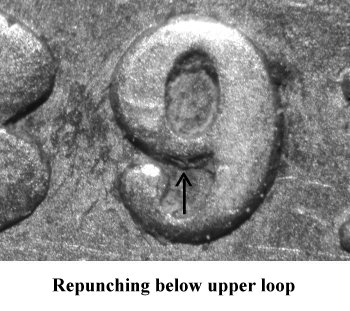
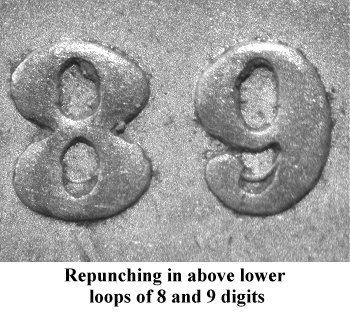
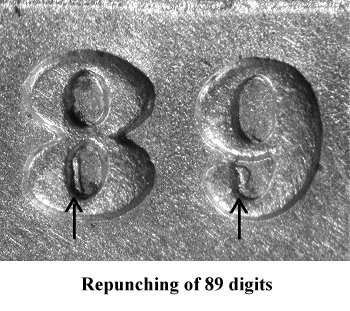
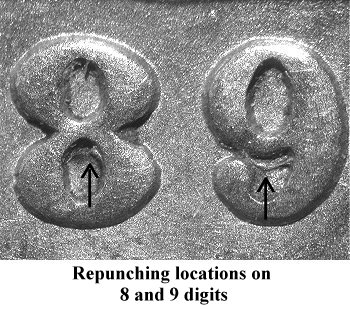
|
F-106 |
Ultimate Varieties |
 |
 |
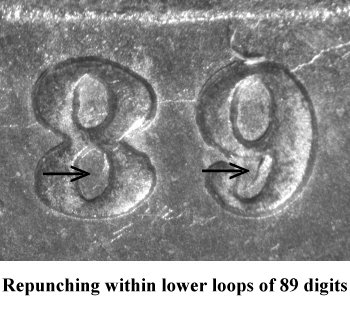 |
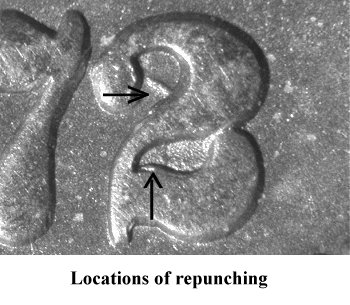
The 8 and 9 digits are boldly repunched with the earlier punch visible in the lower loops. |
|
F-108 |
|
 |
 |
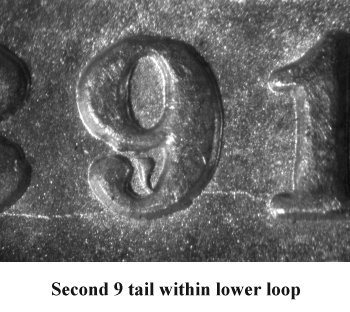 |
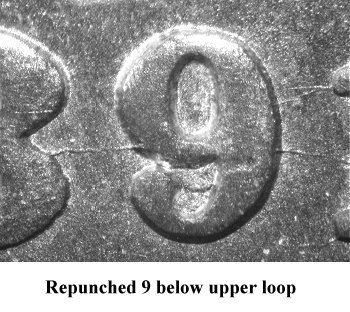
An extra repunched "tail" or ball of the 9 digit is visible in the lower loop. |
|
F-110 |
|
 |
 |
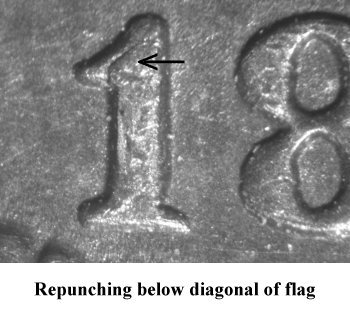 |
The first 1 digit is repunched below the diagonal of the flag. |
|
F-111 |
|
 |
 |
 |
Repunching is visible in the 9 digit below the bottom segment of the upper loop. |
|
F-124 |
|
 |
 |
 |
The first 1 digit is repunched below the diagonal of the flag. There is repunching inside the 9 digit below the upper loop. |
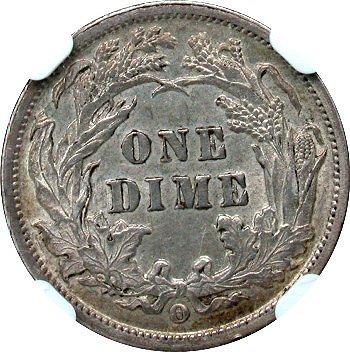
| 1891-O | |||||
|
F-106 |
|
 |
 |
 |
Repunching is boldly visible inside the 8 and 9 digits. Look inside near the bottoms of the lower loops. |
|
F-106a |
Top 100 Varieties Ultimate Varieties |
 |
 |
 |
Heavily clashed obverse die with repunching inside the 8 and 9 digits remaining. Look inside near the bottoms of the lower loops. |
|
F-111 |
Top 100 Varieties Ultimate Varieties |
 |
 |
 |
Repunching is boldly visible inside the 8 and 9 digits. Look inside and to the left of the lower loops. |
|
F-113 |
|
 |
 |
 |
Repunching is visible inside the 8 and 9 digits. Look inside and near the top of the lower loops. |
|
F-114 |
|
 |
 |
 |
Repunching is seen within the tail of the 9 digit. This repunching is obvious. |
|
F-115 |
|
 |
 |
 |
The upper lower loop of the 9 punch is joined to the ball by what appears to be repunching similar to that found on F-114. |
|
F-116 |
|
 |
 |
 |
Repunching is seen directly below the bottom of the upper loop of the 9. This repunching is parallel to the bottom of the upper loop and is similar to the repunching seen on F-106. |